fbpx
Furniture Flipping 101
Learn to Earn

Article Category: How To

*As an Amazon Associate, I earn a small amount from qualifying Amazon purchases at no additional cost to you.

Affiliate links are provided throughout the website and provide me a small measure of income when you make a purchase using those links.

how to strip furniture featured image

How to strip furniture

What does it mean to strip furniture?

As an introduction to how to strip furniture, let’s first look at what it is and why you would consider it. This topic is covered in-depth in the Intermediate Course, along with sanding and stripping. 

Stripping furniture removes old finishes and stains, paints, and sometimes dyes to prep for a new stain or dye, and sometimes paint. There are two methods to remove a furniture finish, chemical and mechanical. Chemical furniture stripping uses solvents, and mechanical uses a mechanical force, such as sanding, scraping, or heating.

Some furniture stripping methods are easier than others, but all methods are somewhat tedious and require a dedicated workspace due to the mess created. It would be best to practice these techniques when you first start refinishing furniture. Find some inexpensive, low-value pieces on which to practice– don’t start on a valuable antique because it risks ruining it and discouraging you.

Why strip furniture?

Before you learn how to strip furniture, you should know why to strip furniture. Stripping furniture of its finish, whether chemical or mechanical, is a lot of work and adds to the expense in both time and products used. To bother removing or stripping the finish, it should be failing in some way. Or, you plan on changing its colour to either recolour or leave it natural. 

A failing finish may be cracking, crazing, chipping, flaking, or otherwise starting to lift, or there is a hazing or gumminess that you want to repair. Restaining to a lighter colour requires removing the darker colour, and even if staining the piece darker, you will get better results if you start with bare wood.

There are alternatives like gel stain if you are going darker. If the finish isn’t damaged and you are preserving the original colour and finish, such as shellac, you may be able to save it with other methods. But for this article, let’s assume that the finish needs to be repaired or you wish to remove it back to bare wood.

*As an Amazon Associate, I earn a small amount from qualifying Amazon purchases at no additional cost to you. Affiliate links are provided throughout the website and provide me a small measure of income when you make a purchase using those links.

Alligatored shellac on oak
Alligatored shellac on an antique oak table leg

Your workspace

Whether using a chemical or mechanical means to strip furniture, you will need a dedicated workspace. Do not strip furniture in your living space. Solvent fumes are toxic and combustible. Sanding dust is also combustible and can cause allergic reactions to some wood species. Heating finishes with a heat gun also produces toxic fumes.

Good ventilation – or working outside if possible, helps to remove the fumes and dust. When working inside a shop, have a fresh air supply – crack a door or window open, or run an air exchanger. A build-up of fumes or dust can ignite when a heater kicks on.  

I work over cardboard for chemical stripping to help catch any slops and mess and protect the concrete floor. Have a disposable container ready for putting the chemical stripper waste in if using that method. A dust extraction system is important when sanding. If you are soda blasting, use a tent or other containment method to catch the overspray and make cleanup easier.

Most refinishers use some form of dust extraction to control both the mess and the risk of fire. 

A separate workarea is important when stripping furniture.

Chemically strip furniture

Chemical stripping furniture is my method of choice. While it uses toxic solvents, it preserves the most wood and often its patina, which I feel is most important. Just be sure to use the proper safety methods, discussed shortly.

For solvent or chemical stripping, you should identify the product class for the finish. The product class of the finish: oil, water, alcohol, or lacquer, will tell you what solvents will work. While most modern heavy-duty chemical strippers will remove any finish, I think less is more. Use the least toxic or damaging product before moving on to something stronger.

Testing

It comes down to whether the finish is shellac, lacquer, or modern film finishes like polyurethane or similar, either oil-based or waterborne. If the finish is shellac, you can use alcohol to remove it. If it isn’t shellac, you can use a heavier stripper.

Alcohol will soften shellac but not other finishes; if it doesn’t soften with alcohol, test with lacquer thinner. Lacquer thinner can remove a few finishes, but I don’t feel it is the best product. Lacquer thinner contains a mix of different solvents, but it evaporates fast. So, my suggestion is if it doesn’t soften with alcohol, you can use modern chemical strippers since they evaporate more slowly than lacquer thinner. Acetone will also soften a lot of finishes, but it too evaporates very fast. Gel strippers tend to be easier to use too. They pool in one place and don’t run off the sides as readily, possibly damaging areas you want to preserve.

Chemical strippers and paint thinner
Different solvents and thinners

Safety

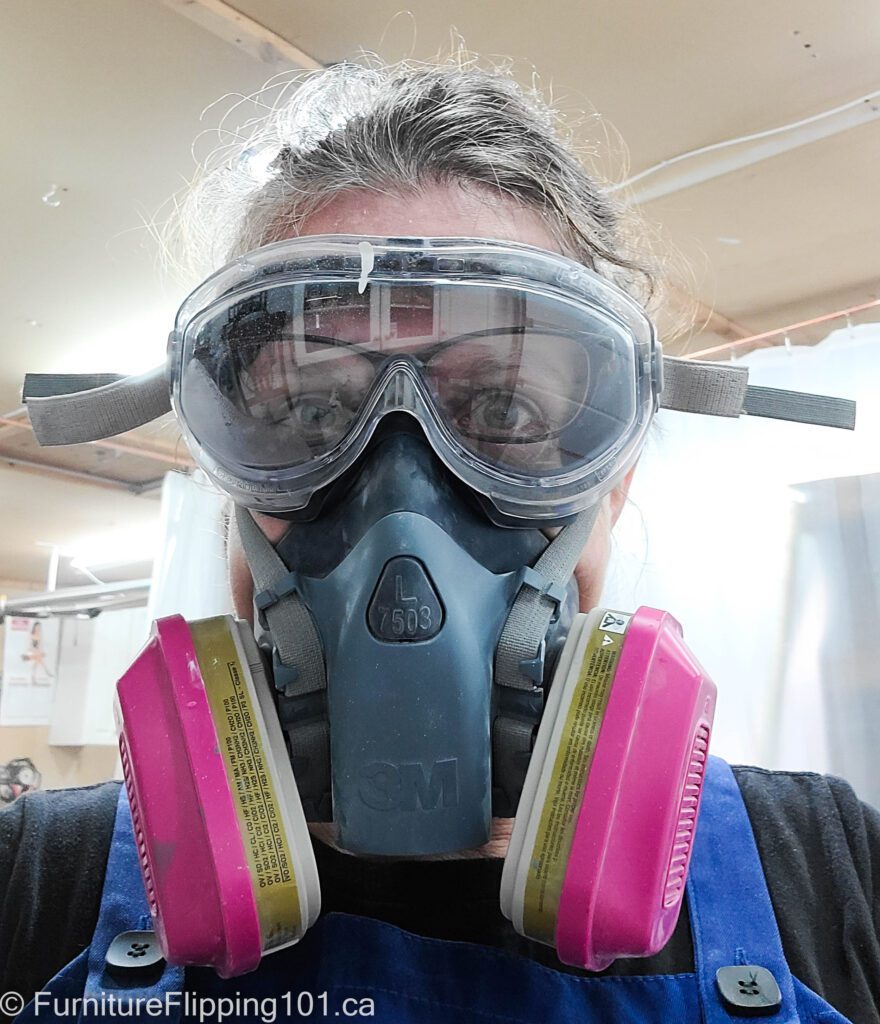
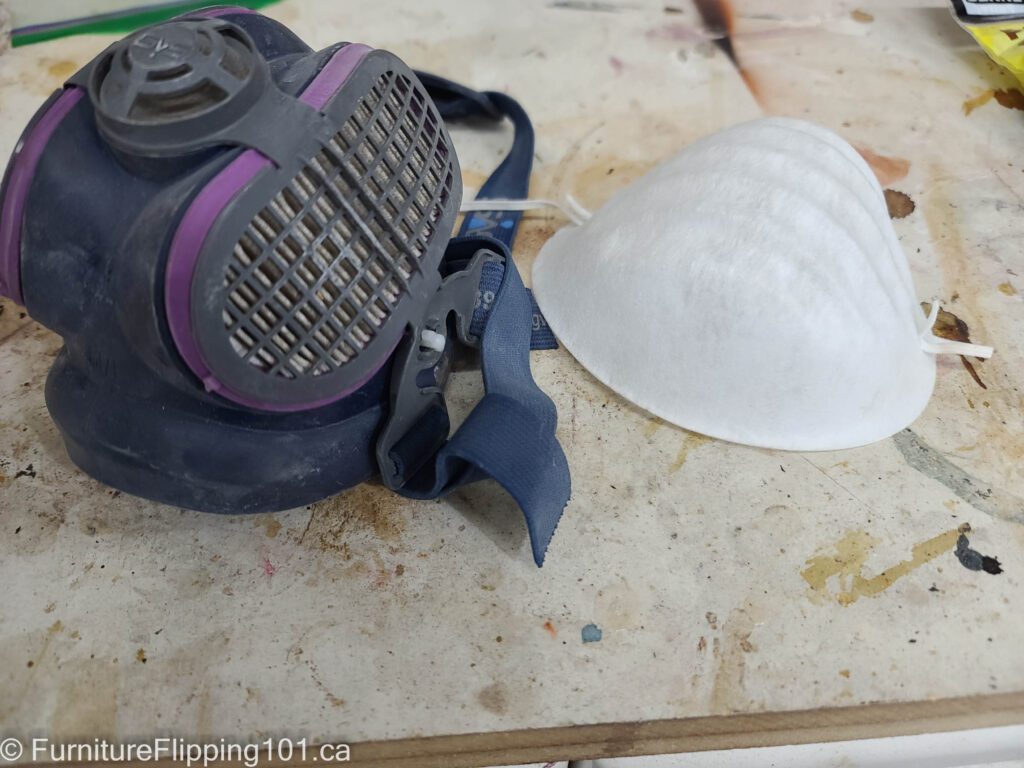
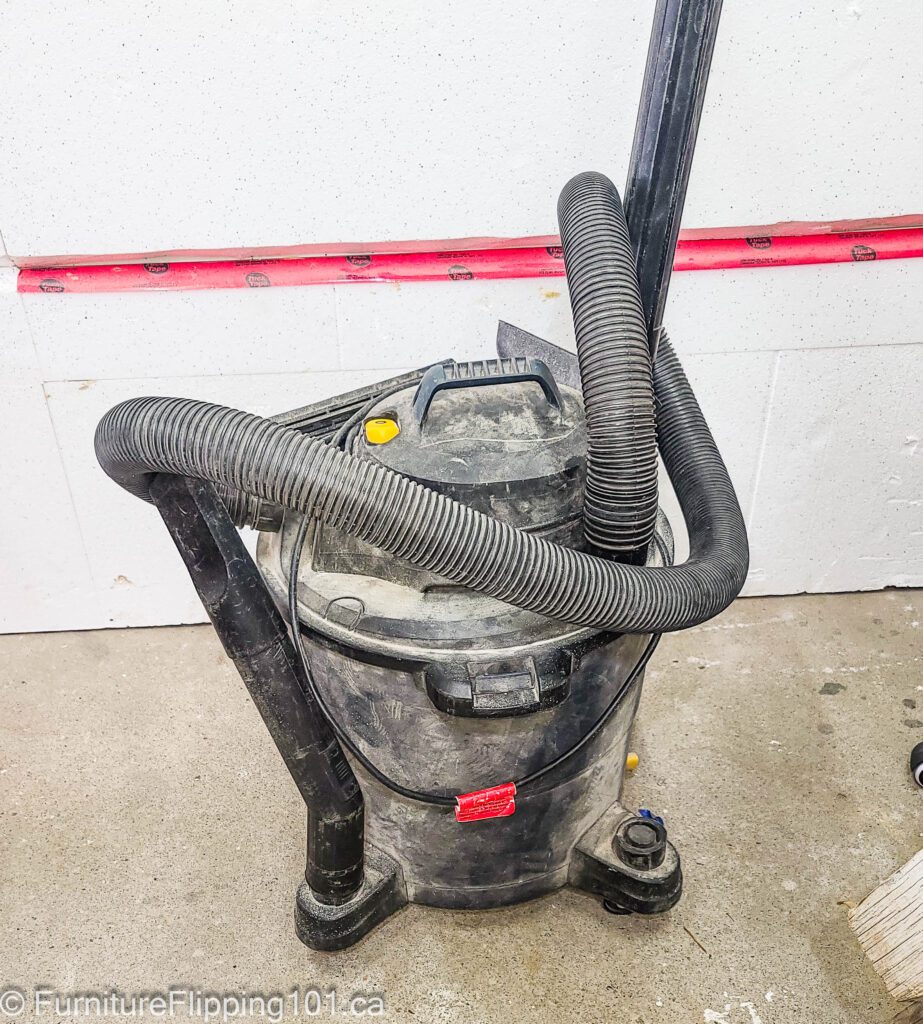
Most chemical furniture strippers are toxic and should always be used in a well-ventilated area with an organic vapour cartridge respirator (P100) to minimize health damage.

You can use disposable nitrile or similar gloves when using alcohol but wear chemical-resistant gloves when using harsh chemical strippers. Wear eye protection, long sleeves and pants, and closed-toed shoes for all solvents to keep the chemicals off and out of your skin and eyes. Keep a pail of clean water handy to immediately wash off any exposed skin or eyes. If you can smell the stripper, your respirator cartridge needs to be replaced.

It’s important to understand that working with alcohol is dangerous. Most alcohols used in stripping are either naturally toxic (methyl hydrate, meths) or have had toxins added (denatured alcohol). Alcohol absorbs through your skin, eyes, and lungs.

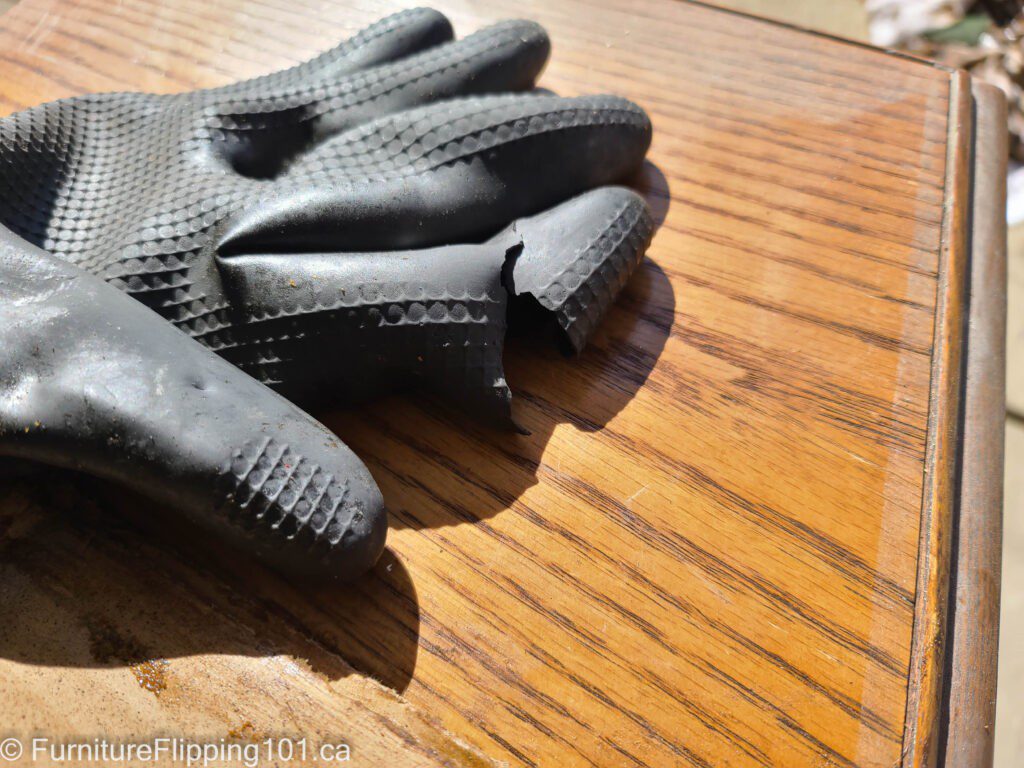
Chemical-resistant gloves are not chemical-proof. I have ruined many pairs as they soften and then tear. So keep a spare pair or two available when the inevitable happens, and you are in the middle of a project.

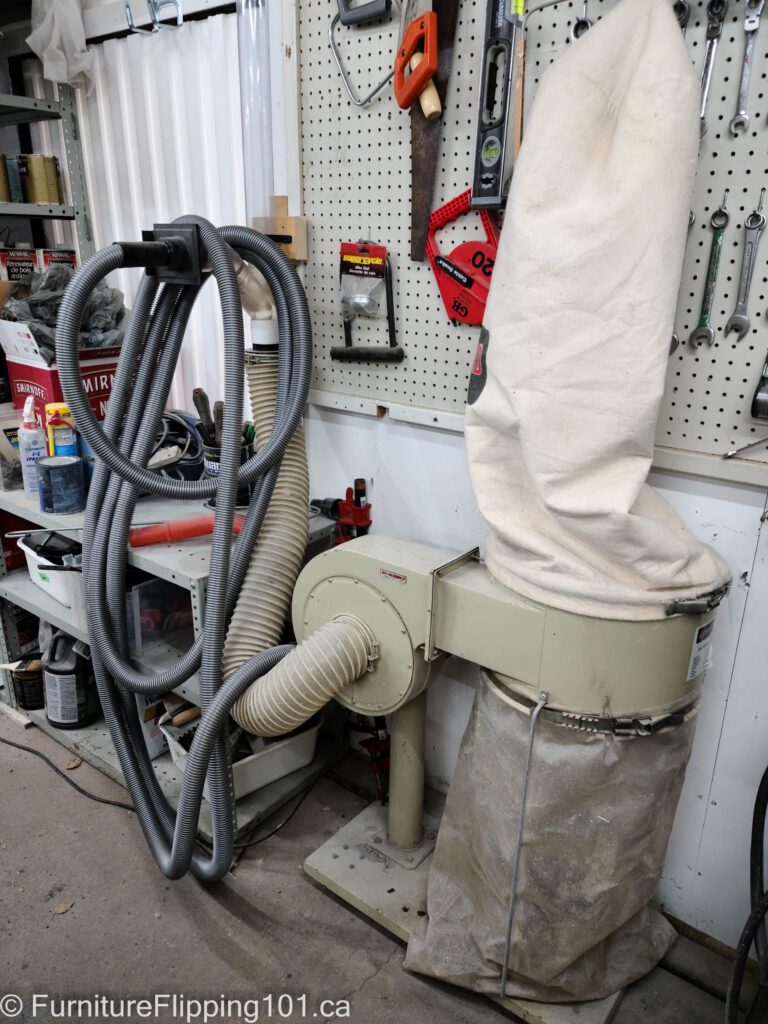
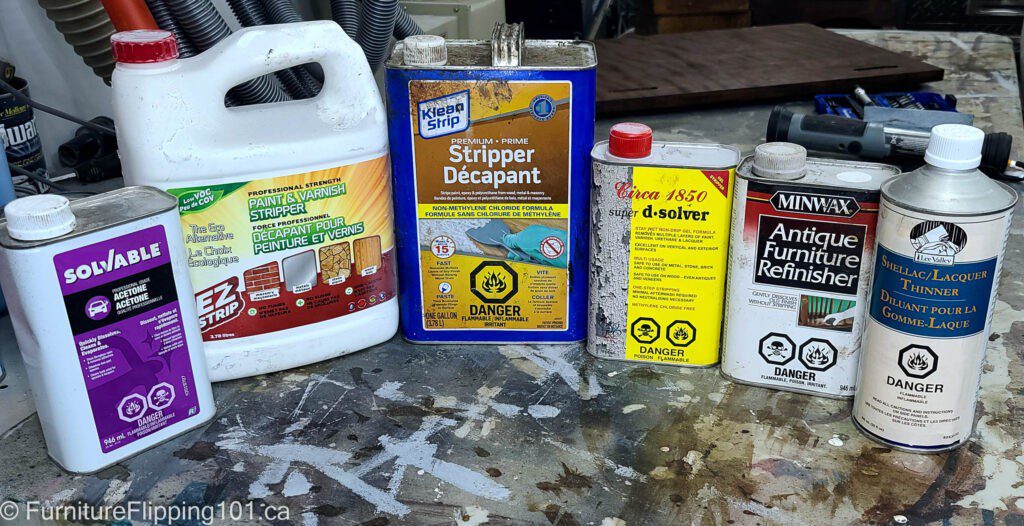
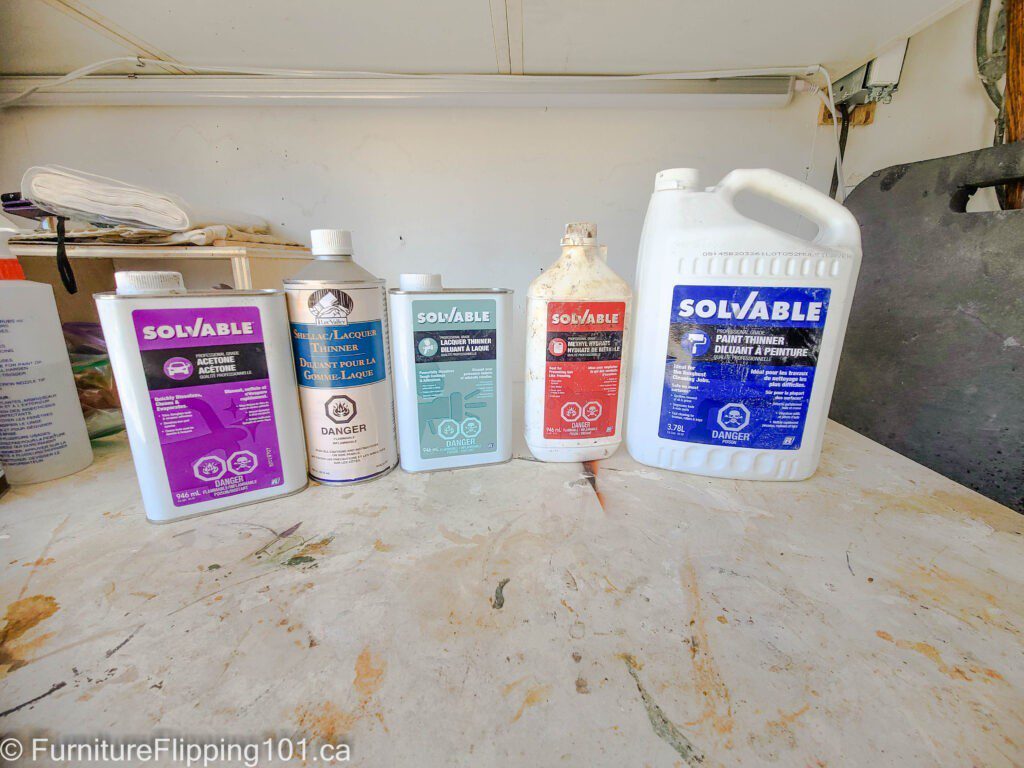
Use best practices with solvents – do not work in an enclosed area without ventilation, assume a rag will self-combust, and always wear the proper personal protective equipment or PPE.  Dispose of the waste as per your municipality’s disposal regulations. Ensure you properly store your solvents in their original containers or clearly labelled containers designed for solvent storage. Keep them away from children and pets and at the proper storage temperatures.

Check out this article that expands on how to refinish furniture safely. 

Chemical-resistant, not chemical-proof.
Organic vapour mask and googles

Best products

I use methyl hydrate (alcohol) to remove shellac. For other furniture finishes, I use gel strippers. The more viscous or thicker the stripper, the better it will stay in place, which increases its effectiveness. Given a choice between two strippers, I would choose a gel over a liquid. I don’t have one brand I prefer, but I avoid “green” ones. That isn’t to say they don’t work, but they take a lot longer and more applications.

Although it seems to have died down lately (no pun intended, I hope), there was a trend to use oven cleaners to strip furniture. The majority of the posts used the “fume-free” version. This formulation does not have lye. I looked up the MSDS for the Easy-Off Fume Free product: https://www.kandelandson.com/site/images/stories/sdsnew/Easy%20Off%20Fume%20Free%20Oven%20Cleaner.pdf

Here is a summarized list of the ingredients. *Disclaimer I am not a chemist or qualified to analyze the combination of these products; this is for information and research purposes only.

The solvents used are ethanol (grain alcohol), potassium carbonate (white salt/potash – strongly alkaline), aminoethanol (ammonia), isobutane (propellant, petroleum-based), and limonene (plant-based solvent).

The problem with using off-label products and home remedies to strip furniture is that you are running a serious health risk unless you are a chemist and understand the possible interactions between different chemicals. For example, if you use a product containing lye (as regular oven cleaner does), or ammonia (as the fume free version does), you can make chemical-warfare-level toxins.  Lye and bleach make chlorine gas. Ammonia and bleach make chloramine gas. So don’t use oven cleaner, and then wash it off with bleach. This statement might seem obvious, but bad things have happened to people who just didn’t think.

For the “fume-free” version, you may not find it any more toxic than the laundry list of chemicals that you will find in any of the chemical strippers, but keep in mind that the product was not designed for stripping furniture, so you are running a risk by using it for this.

Always read and follow the instructions on the container – and if it is designed for something other than what you are using it for, then proceed at your own risk. Any product you buy will have an MSDS sheet – download it and review the safety precautions as an added safety step.

Applying

If you are using alcohol, it is liquid, and you need some way to contain it – this is easier on small pieces that fit into a plastic tub. For large areas, I pour the alcohol on and use a rag to keep it from running off the edge. It usually bites into the shellac and forms a bit of a pool. Then I use lots of rags and wipe and scrape with a scraper, not gouging the wood. It takes several applications, many rags, and patience.

Shellac is very sticky, so disposable gloves work well so you can quickly change to another pair. Once you get the old shellac off, if you wish, you can give a very light sanding to ensure there isn’t any residue – I use 180 or 220P. Preserving the wood’s patina on antiques should be a priority, so use more alcohol and less sanding, if possible.

For chemical strippers, you do not brush these on. You’ve likely watched many YouTube videos showing you how to brush out the stripper – this reduces its effectiveness. Thin applications dry out fast – if the stripper dries out, it is not working – this means all the solvents have evaporated. Pool the stripper on the surface and carefully spread the pool out evenly with a metal spatula or chip brush.

For carved or recessed areas, you can use a brass brush to get the stripper into the recesses. Then leave it alone. Don’t let those pools dry out – add more stripper if necessary. If you can’t apply the stripper in a pool – like the sides of a large dresser- you need to pour and spread the stripper down the vertical surface carefully – the thicker the pool, the faster and more effective the stripper. Watch not to get it on your arms as you do this. I use a chip brush to stick the stripper to the legs or chair spindles as thickly as possible. If the legs come off the piece, you can use a tub to strip them.

Once you see the finish bubbling and lifting off under the stripper, use a metal spatula to remove the gooey mess into a disposable container. It can take two or three applications for some difficult finishes.

I let the stripper waste evaporate outside and dispose of it with our household garbage. Look into your municipality’s disposal regulations. Chemical stripper solvents can cause self-combustion, so be careful. Store any waste and rags outside.

Once you have removed the finish, remove any residue with mineral spirits. Lay these mineral-spirit-soaked rags flat to dry or soak them in water. Because the chemical solvents are not water-based, they should not have raised the grain. You can use a small carbide scraper to get into any missed areas. The finish should be soft enough to come right out.

Dyes may have soaked deeper into the wood than you can pull out – try acetone and alcohol on any dye stains to see if you can budge them. I will use a very light sanding with 180 or 220P once the wood has completely dried. I suggest waiting overnight. Never sand a wet surface.

I use this plastic tub to strip smaller items like this shellacked silverware box.

Mechanically strip furniture

Mechanically stripping furniture can take a few different forms. You can sand, blast, scrape, or heat the finish to break its bond with the surface. Many refinishers reach for their random orbital sander as the first choice. And while sanding the finish off is an accepted form of stripping, I suggest not choosing it as your first approach.

*There are some states and provinces with stricter VOC legislation that limits the use of solvents. If you have trouble finding chemical strippers, you will likely need to use the following mechanical methods to strip furniture.

If you are working on a very thin layer of veneer, that is a very vulnerable piece of wood. To get it to the stage it is now at, the original refinisher would have already sanded it to an acceptable level of smoothness, then likely stained it and sealed it. If you sand off the finish, you will likely sand down into that wood. And, if you are unfamiliar with sanding or don’t know how grits work, you can quickly burn through the veneer or leave too coarse of scratches that you will have to sand out, removing even more wood. Chemically-stripped pieces require minimal sanding to prep for stain.

And why does this matter? Wood’s natural beauty comes from its grain. Not all wood has a strong grain pattern, but it’s the depth of the grain that contributes to the overall beauty. So, if you sand the wood too thin, you lose the grain lustre. The wood will look flat and almost artificial. And if you sand through the veneer, you will have a prominent spot that you will need to patch, faux-finish or fill.

Random Orbital Sander

How to sand

So, while many people will vehemently argue you can sand off finishes to strip furniture, and some even recommend starting at 60 or 80 grit, I am not one of those people. I also believe that we all need to develop our personal style, and there are strong arguments against using toxic chemicals.

So, if you do not want to strip chemically, you can sand, but start at 120, especially on a veneered surface –so those scratches won’t be as deep and will allow you to do a light finish sanding at 180. It may take longer than starting at a very coarse grit, but you will be able to control how deep you are sanding with finer grits. The higher the grit, the less wood you remove when sanding. However, if you wish to remove the old stain, you have to sand off some wood to get to the unstained wood beneath. Sanding this deep can thin the veneer too much.

Use a sanding block or a random orbital sander on flat surfaces, or a sponge sander if sanding a rounded surface. There are many pricy sanding systems out there, and if you own one, you will likely find them quite effective for sanding off a finish. But learn the correct grit sequence and when to stop sanding. It is very easy to oversand, especially with power tools.

This is an overview of sanding rough wood - the first step should not be used to remove finishes.

Use caution when you sand to strip furniture

One of the most common furniture stripping mistakes made by beginners involves oversanding. I have seen countless posts of photos where someone has sanded through the veneer, and now they are looking for help to fix the damage.

If you feel starting with 60 or 80P grit is a good idea because of how fast it works, consider how much wood you will have to remove to eliminate the deep scratches left by that coarse of grit. 60 or 80 grit is much coarser than the depth of finish, and you will scratch into the wood’s surface.

Each successive step needs to sand down the ridges left, and will leave its own scratches, also sanded out by the next step. If you plan on sanding at 80, you need to sand 120 and then 180 or 220, at minimum. Even if you skip more than two steps, which isn’t a best practice, you will still need to sand out the 80-grit scratches. You will remove a great deal of wood – look at the volume of sanding dust created.

Another cause of sanding damage is using a power sander – these machines quickly remove a lot of wood, much faster than you can by sanding by hand. If you wish to use a power sander, choose a random orbital (they have round pads) because they leave less obvious scratch patterns than an orbital or mouse sander. Your final sanding should be hand finished with a sanding block or foam-backed sanding pad.

Ensure you don’t sand over the edges and round off or smooth down areas by mistake. Hand sand any carved or rounded areas unless you have a sander that can safely manage curves.

You can save a lot of wood if you use a chemical or a scraper discussed next to remove the bulk of the finish, then do the final stripping with 180 or 220 grit, depending on your preference. You might not notice a difference for solid wood softwoods, but on mahogany or walnut veneers, it can make a big difference.

Sanding is covered fully in the Intermediate Course’s Sanding 101 Module

Note the whorls/marks left from an orbital sander. Photo credit: Facebook post
Over-sanding is the number one beginner mistake. Credit: Facebook post

Other methods

I use a carbide scraper when removing old, alligatored shellac. Soften the shellac with alcohol and scrape it off. Carbide scrapers do not damage the surface or remove any wood if you are careful. You can also use card scrapers which offer a bit more control and scrape a smaller area. Card scrapers get hot from friction, though, so wear gloves. Some people use a carbide scraper to remove film finishes, and with practice, this can be very effective. You aren’t scraping into the wood, just removing the finish layer.

Soda blasters and heat guns are other mechanical methods used. I haven’t tried a soda blaster, but it seems it could dull the carved edges of ornate pieces. I’ve seen posts on Facebook of damage done by a soda blaster to veneer. I would do some research and practice runs before trying it on anything of value. And heat guns could lift veneer, so I would not use them on veneered surfaces. You can also scorch wood with a heat gun, so work on the lowest, most effective setting and keep the gun moving, not focusing on one spot too long.

If you have a solid wood piece, you have more flexibility to sand off a finish, but you can still thin a piece of wood too thin. Don’t over-sand and alter the proportions of the wood.

The Introductory Course’s Tools, Supplies, and PPE module covers many of these tools, plus much more. 

L-R: Carbide scraper, chisels (not for stripping), small carbide scraper with changeable-heads, and card scrapers.
There are better heat guns than this with variable heat settings.

Safety

Always wear a dust mask when sanding – replace these regularly since the filter gets plugged up and can make it uncomfortable to wear. Safety glasses keep sawdust and flying debris out of your eyes. Gloves aren’t necessary unless you use a heat gun, and then you can use leather gloves to prevent burns.

Dust is combustible, and you need to control it with a dust collection system. You can use a shop vacuum connected to your sander or a more advanced system with a funnel or a dedicated dust-collection system. If you only use the filter attached to your sander, clean it regularly, or you will burn out your sander.

Dust masks for sanding
Shop vacuum
shop dust collection system
Dust-Collection System

Summary

In summary, I check for shellac, and if it is shellac, I strip it with alcohol. If it isn’t shellac, I use a chemical stripper.

If you plan on sanding off the finish, learn how sanding works and what grits are acceptable for woodworking. Follow the stepped method, not skipping more than two grit steps.

For other methods, like a carbide scraper or soda blaster, learn to use these methods on practice pieces of low value.

Looking for more? Check out these articles.

Thank you! Your responses have been received.