fbpx
Furniture Flipping 101
Learn to Earn

Article Category: Products & Tools

*As an Amazon Associate, I earn a small amount from qualifying Amazon purchases at no additional cost to you.

Affiliate links are provided throughout the website and provide me a small measure of income when you make a purchase using those links.

Why you need to understand the components of paint and stain.

When we first start flipping furniture – whether you want to paint or are a purist and refinish using only stain- you will need to understand the components of paint and stain to make the right choices for your project.

It can be frustrating and overwhelming to walk into a paint store or choose from the dozens of online boutique paints if you don’t understand the differences between the products. Next to over-sanding, likely the biggest beginner mistake, I would say the next most common mistake is trying to mix incompatible products.  Some of these mistakes or problems are covered later in this article. 

One of the most in-depth subjects in the Furniture Flipping 101 program, the first module is dedicated to choosing paint and stain because I consider it essential to understand the components of paint and stain, how they cure, what factors to consider, and how to add, remove, store, and dispose of the products, before you start. Many students find this module heavy, especially as an opening subject, so I want to introduce the topic to break the ice.

This article will cover the components of paint and stain. Should you wish to learn more, I encourage you to enroll in the Introductory Course that covers more fundamentals that beginning furniture refinishers need to know. You can read more about what is included on this page.

The Components of Paint and Stain

Let’s get started. Manufacturers very carefully choose the components of paint and stain to impart particular qualities: durability, colour-fastness and accuracy, adhesion, ease of application, and sheen, to name a few. While we will cover the components of paint and stain in this article to give you insight into the products in general, you must consider all of these factors as part of the overall decision when choosing paint and stain.

Colour Components of paint and stain

Use a colour wheel to choose complementary, analgous, or opposite colours for your projects.

One of the most obvious components of paint and stain is colour. But what components give paint and stain their colour? For the most part, paints and stains contain pigments. Pigments are large, opaque to translucent particles. The opacity varies depending on the colour and source of the pigments.

Another component, dye, is also used. While it differs from stain pigments, a dye can be considered a similar product. Dyes are tiny, translucent particles that soak into wood fibres rather than lodge between them. Some products, usually stains, contain pigments and dyes to capture the best characteristics of both products.

When you choose paint and stain, you often consider the colour your primary decision. But almost all colours are available, no matter which product you choose. With one exception, dyes are transparent and not available in white.

Pigments are larger particles that lodge between wood fibres or group together in paints to form a solid colour.
Dyes are microscopic particles that soak into wood fibres.
I love the translucent effect dyes bring to wood. This is a piece of spruce burned shou sugi ban style, and then dyed and sealed.

Paint and Stain - What's the Difference?

Paints and stains provide very different looks and they have different characteristics. First, consider the look you wish to achieve when choosing between paint and stain. Also, consider the furniture’s construction materials, overall condition, end-use, and your skill level. Not all pieces can be stained and not all pieces should be painted. 

Durability isn’t a factor when choosing, because paints and stains (and dyes) are very different products. Paints contain a binder that creates a protective film. Most stains (and dyes) do not have a binder or resin but are only pigments (or dyes) in a carrier. Stains may have a small amount of binder to hold the pigments in the wood, but they usually don’t have enough resins to produce a durable film. You will need to add a durable finish over the stain or dye.

Some stains have a polyurethane component, or finish, mixed in. I do not recommend those products because they can be fussy to apply and rarely turn out as nicely as using individual stains and finishes. So, you choose paint and stain based on the desired look, then choose the durability of the finish (clearcoat) or the paint. Stains are not durable on their own. An exception is an exterior stain. Exterior stains have binders added – you won’t need to add a protective finish.

Choose your design - all paint, all stain, or a combination of the two.

Water or Oil-Based Paint and Stain

Once you have decided if you want to paint or stain, you can choose the product’s base. I expect that you’ve heard of water and oil-based paints and stains. There are actually four classes of paints and stains: water-based, oil-based, alcohol-based, and lacquer-based. These bases relate to the binders and solvent, which we will discuss later.

This article will focus on water- and oil-based products. When you choose between water and oil-based, the difference comes down to curing times, ease of use, durability, and other factors such as yellowing and odour.

You can tell what base the paint or stain is by reading the label – if it cleans up with water, it is water-based, and if it cleans up with mineral spirits or paint thinner, it is oil-based. Alcohol-based products almost always contain shellac resins, and they clean up with alcohol or ammonia. Some dyes are alcohol-based. Lacquer-based products clean up with lacquer thinner.

components of paint and stain - choosing the same product class image of different product class finishes
Oil, water, and alcohol-based clear finishes.

Compatibility of the Components of Paint and Stain

Water and oil-based products are incompatible with each other. You cannot mix a water-based product into an oil-based product and vice versa. You can put them over one another, but exceptions and rules exist around this. We will get to some of those a bit later. 

Resins / Binder components of paint and stain

Binders, also known as resins, are the film-forming component of paints. As noted, stains and dyes don’t have significant amounts of binders.

Binders are class-specific and generally do not mix across classes. There are exceptions, such as polyurethane and newer products; alkyd resins suspended in water-based carriers are one example. These newer products are water clean-up but incompatible with other acrylic resin paints: i.e. do not mix them.

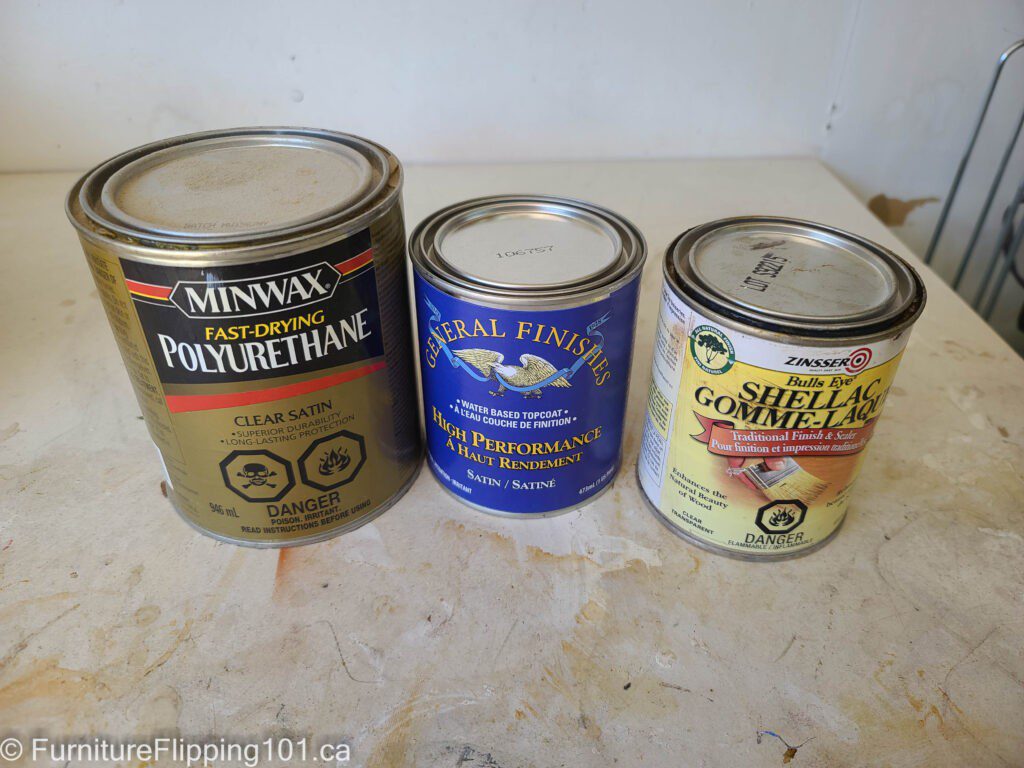
The standard water-based binders are acrylic, vinyl acrylic, polyvinyl acetate (PVA), and polyurethane. Oil-based binders are naturally drying oils such as tung or linseed, phenolic resins, alkyd resins, or polyurethane. Most consumer products with polyurethane are clear finishes and not paints.

Want to hear something shocking?

Latex paint is a lie and does not exist.

Say what?

Yep.

Natural latex is a common allergen and is not found in consumer-grade paints. Why are paints still referred to as latex? Maybe familiarity? PVA resins, a synthetic latex, are used in wall paints – they are rubbery, making them poor furniture paint. So, any time I hear people refer to latex paint (including manufacturers!), I cringe because it isn’t accurate.

Carriers and Solvent components of paint and stain

Carriers are the liquid components of paint and stain. The carrier is either water, oil, alcohol, or lacquer-based, depending on the binder’s class. The carrier, which contains solvents, evaporates after application. The purpose of a carrier is to act as a vehicle for the pigments, binders, and other additives, plus aid in application and curing.

Drying vs. Curing

One misunderstood part of painting or staining is the difference between drying and curing. Drying is the evaporation of solvents, and curing is the formation of a durable film. Once cured, a product will no longer be soluble in its solvent.

It is essential to understand how products cure as you learn how to refinish furniture. Water-based films are weaker than oil-based films due to the curing process. A water-based product dries very fast but cures slowly, and an oil-based product dries slowly but cures faster.

You will also use other products like finishes, primers, drying and non-drying oils, and waxes. As a heads up, waxes do not cure – they do not undergo coalescence or polymerization; the solvents evaporate to dry only. Waxes dissolve in a solvent such as mineral spirits or ammonia, unlike cured paints and some stains that cannot be dissolved with their solvents (only harsher chemical strippers). Waxes have a drying or iodine index of close to zero.

As noted already, many stains do not have binders and do not form a cured film; therefore, they can be removed, albeit not entirely, with their solvent (water or mineral spirits, for example).

Coalescing vs. Polymerizing

Water-based resins are ‘precured’ and then suspended in a carrier containing solvents that evaporate over 30 days and pull the resins together to form a film. This process is called coalescence.

Oil-based products polymerize as their solvents evaporate, exposing the oil resins to oxygen. As these resins polymerize, they form a tight bond with one another, creating a strong film. This film is strong, but brittle.

NOTE: Polymerization involves oils reacting with oxygen, which gives off heat and can cause rags and brushes to self-combust. You should always allow your oil-contaminated rags and brushes to dry flat or immerse them in water to prevent this from happening.

A quick video showing rags self-combusting. Our friends nearly lost their new deck and possibly new home when they left the old rags unattended outside and went for a walk.

Water-based paints dry in a couple of hours and cure over 30 days. Oil-based paints and finishes take up to 24 hours to dry but cure in seven days. These timelines vary with different manufacturers and the humidity and temperature of the room. Ideal application and curing conditions are 20° C / 70° F – 25°C / 77° F and 50% humidity. Never dry your pieces in direct sunlight, as this can alter the speed at which the product cures and possibly result in a weakened finish.

Alcohol and lacquer-based products are evaporative curing – except two-part products that use a catalyst to strengthen the product. Unlike waxes, these products form a durable cured film; however, they can be dissolved by their solvents even when cured.

Problems caused by components of paint and stain

Products of the Same product class

When we choose products from the same class, for example two water-based products, we can run into problems. The solvents from the topcoat can be the solvent for the base product. As noted, stains don’t have a binder, or much of one, and they are therefore not ‘cured’. Because of this, the solvents in the clearcoat can lift the stains and muck up your finish. You can solve this by either choosing an oil-based stain under your water-based finish (or vice versa) or spraying on the first coat of finish.

Products of a different product class

You can’t combine different product classes together – oil and water don’t mix. However, you can use a water-based finish over oil-based stains, just allow them to dry for 72 hours before top-coating. You cannot apply water-based paints over oil-based paints without first applying a bridging primer. You can tell if products aren’t compatible with one another if you find the topcoat beads and doesn’t adhere to the base coat.

I was painting second-hand doors and encountered oil-paint. I used a bridging primer to solve this adhesion problem.

Waxes can cause problems if you use them under another product. The general rule of thumb is that wax is last. This is because wax is hydrophobic and creates adhesion issues, especially with water-based products. Some waxes are light and don’t cause as much of a problem as others, but I would not take a chance unless you wish to experiment and see if you have problems.

Shellac makes a great bridging agent between incompatible layers, just make sure you choose a dewaxed shellac product. Traditional shellac contains a small amount of wax that can interfere with adhesion.

Confusing Labels

While I said earlier, you can tell what product class your paint or stain is by reading the label and seeing if it cleans up with water or mineral spirits (or alcohol/lacquer thinner), some of the newer products are a mix of oil and water using chemistry. It is important to know your products – those alkyd emulsion paints with water cleanup are not the same as acrylic, water-based paints. The two products cannot be mixed together. The best way to be sure is only mix the same brand line of paint with itself, or test a small amount separately to see if they apply correctly and don’t separate.

Essentially, always read the labels to ensure you aren’t buying the wrong product and test on sample boards when working with new products.

Alkyd emulsion 'water-based' interior paint.

Additive components of Paint and Stain

Additives are simply products added to paint and stain to impart beneficial qualities. Minerals, such as calcium carbonate, create chalk paint. This additive adds many benefits; even those disparaging chalk paint likely use it without knowing. Many primers contain calcium carbonate or similar minerals to improve adhesion and coverage. Other additives speed up drying, slow drying, add UV resistance, improve flexibility, etc. 

Some of the additives I use to make my own chalk-style, mineral paint. L-R: Plaster of Paris, clay, calcium carbonate, talc powder.

Summary

Pigments, binders, carriers, and additives are the main components of paint. Stains and dyes are mostly pigment or dye and a carrier. Finishes contain binders, carriers, and additives and usually don’t contain pigments or dyes unless added as a toner.

While this article has given you an overview of the components of paint and stain to get you started, the Introductory Course’s Choosing Paint and Stain module covers many more topics and further details on the previous components.

Please let me know in the comments if you learned anything today about the components of paint and stain from this article or have any questions.

share this article:

Facebook
X
Pinterest

Leave a Reply

Looking for more? Check out these articles.

Thank you! Your responses have been received.