

If you have encountered any of these products: grain fillers, seal coats, pre-stain conditioners, or sanding sealers, you may wonder what their uses are and which one you should use. And do you have to use all of them, some of them, or any of them?
Grain fillers, seal coats, pre-stain conditioners, and sanding sealers are all optional products used to achieve a specific outcome. But even though they are optional, learning how to use them in the right circumstances can elevate your final finished project to professional levels.

What do these Products do and how do I use them?
As with any product, you must know what it does and how to use the product or products to achieve the desired outcome. Okay, so you may ask, what outcome can I achieve with grain fillers, seal coats, pre-stain conditioners, and sanding sealers, and what are the right circumstances?
Grain fillers, seal coats, Pre-Stain Conditioners, and Sanding Sealers and What we use them for
Let’s start with what grain fillers, seal coats, pre-stain conditioners, or sanding sealers are used for when refinishing, and then we will move on to how you use them and in what order.
- Grain filler creates a smooth, texture-free or pore-free surface to apply the finish.
- Seal coats create a barrier between incompatible products or are used to prevent solvents from one product from affecting a previous product layer.
- Pre-stain conditioner reduces and evens the absorption of penetrating stains into woods prone to blotching.
- Sanding sealer creates a more easily sanded surface, improving the final finish.
What to Watch For
Multi-Use Products
Knowing which product to use can be confusing because some product uses can overlap – both grain fillers and sanding sealers work to smooth the surface. De-waxed shellac is multipurpose, working as a seal coat, pre-stain conditioner, sanding sealer, and finish, depending on its viscosity or cut. A regular varnish can be cut with mineral spirits to make it easier to sand, creating a sanding sealer.
Compatibility
When combining different products on one piece, ensure you understand their compatibility. Companies like General Finishes ™ do extensive testing with their product lines but will not guarantee any competitor’s product compatibility with their own.
If you have taken the Furniture Flipping 101 program’s Introductory Course, you will understand the different product classes and solvents and which ones can be used over or under another. However, even compatible products can react when combining different companies’ products.
*TIP: Always do a test board before starting your project to avoid compatibility problems. It doesn’t have to be the same wood species, but it is ideal if possible.
Desired Outcome and When to use Grain fillers, seal coats, pre-stain conditioners, and sanding sealers
Once you understand the product’s uses, you must decide what you want your finished project to look like.
A Smooth Unblemished Finish
Most of us desire a smooth final finish, but not every circumstance. Sometimes, you want the wood’s grain and pores to show through to create a more rustic vibe or to use products that highlight the wood grain. I focus on using film finishes in this article, which aren’t known to bring out the wood grain, but an alternative to a film finish is a drying-oil or one part hard-wax oil. I will have an article out on these shortly. For this article, let’s learn how to achieve a smooth, unblemished finish using grain fillers and sanding sealers.
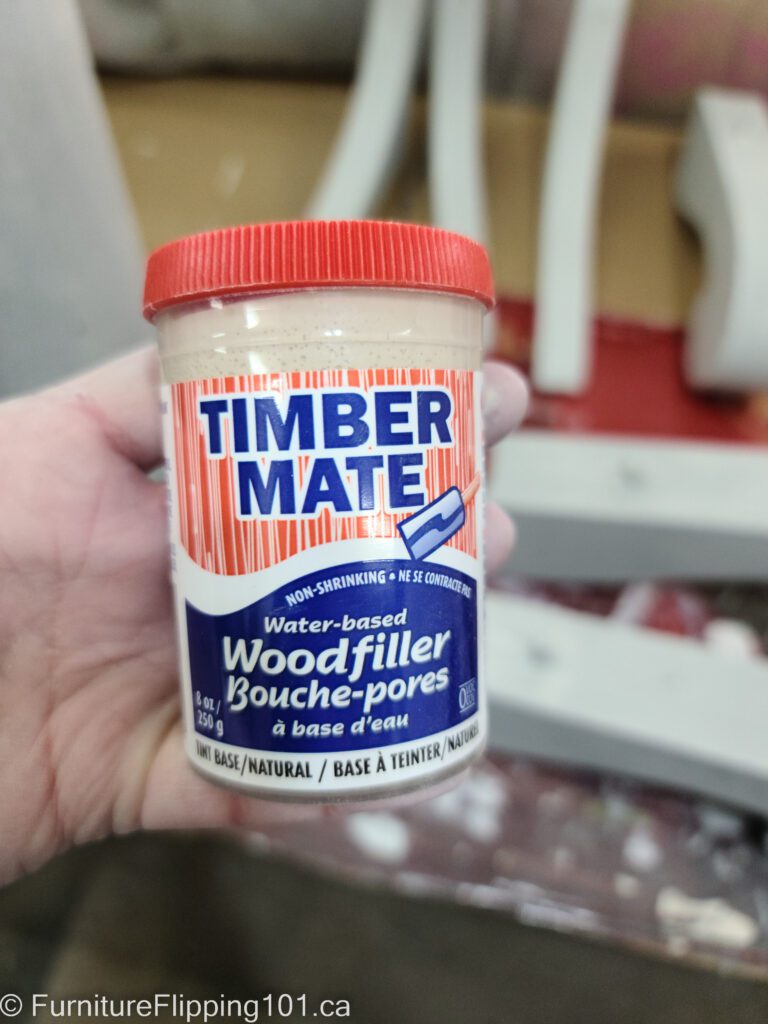
Grain Fillers
If you wish to have a smooth surface without grain texture, grain filler and sanding sealer can help you achieve that. As the name states, that is what grain fillers do; they fill up the grain and bring it even to the project’s surface. You can use multiple applications of grain filler if the product allows. There are homemade versions, too, using pumice and boiled linseed oil. Always consider compatibility – if you use a water-based finish, you won’t want to use linseed oil.
Woods like maple or walnut won’t take as many coats of grain filler as deep, open-pored/grained woods like plain-sawn red oak. Often, kitchen cabinet painters fill the grain when painting cabinets to give the final finish a smooth, blemish-free look.
Seal Coats
Note: A seal coat between the grain filler and stain (whichever order you use them) or paint may be necessary to prevent flashing or incompatibility issues. When painting, you would use a primer as the seal coat.
Sanding Sealers
A sanding sealer will improve the smoothness of the final finish. A sanding sealer is a finish layer containing a stearate and is softer than a traditional finish, making it easier to sand without gumming up the sandpaper. Because the sanding sealer is soft, additional final finish coats are required.
Apply two coats of sanding sealer, sanding after the second coat, and seal with the final finish coats. Paint doesn’t require a sanding sealer. If you don’t have a specific sanding sealer, you can also thin the final finish with the manufacturer’s suggested product for thinning and up to the maximum ratio. Note that thinning oil-based finishes is not recommended due to environmental concerns when spraying. If you are brushing on the seal coat, this won’t be a worry. At most, thin to a 50% ratio with mineral spirits.
Note: Sanding sealers, because they are soft, can affect a brittle finish applied over the top. Always sand back the sanding sealer layers to reduce their thickness and minimize the chance of top layers cracking.
Applying the Finish Coats
Spraying on the final finish coats or paint will also provide a much smoother, finer finish than a brush. You can also wet sand the final coats to achieve a smooth, blemish-free finish.
The Final Colour
When painting, products like grain fillers do not affect the final colour since paints are opaque. However, if you are staining the piece, there are a few things to consider regarding the final colour of your project.
Accent or Hide the Grain with Grain Filler
Determine if you want to accent or hide dark, open grains like oak. You can use coloured grain filler as a feature or plain, uncoloured grain filler to blend in to provide a more even overall colour. Check to see if the grain filler is available with a colour already added, if you can add a dye or pigment, or if it will take stain. Some grain fillers do not show when used following the manufacturer’s instructions. Clear grain fillers are available, too.
Decide if you want an even stain tone or accent wood grain differences with grain filler. Sometimes, finishers use coloured grain fillers after staining to accent the grain. Other times, they will use grain fillers before staining for a more even colour. Grain fillers can also help block penetrating stains from seeping into open pores and seeping out later. Read up on the best grain fillers to use for your desired outcome.
Pre-stain conditioner with stain, or using Dye and Toner
Consider using a dye or toner instead of a penetrating stain to provide a more even finish for wood species like maple or birch, which are prone to blotching. If you wish to use a penetrating stain, consider using a pre-stain conditioner to help reduce blotching. Gel stains also create a more uniform colour than penetrating stains. Remember that all stains require sealing – never stain a piece without using a protective finish afterwards.
Step-by-Step guide to use Grain filler, seal coat, pre-stain conditioner, and sanding sealer
This is a suggested order of operations to use these products and achieve the desired outcomes. Always read the manufacturer’s instructions before choosing your products to ensure they work for your intended purposes. If their instructions differ from these, follow the manufacturer’s instructions.
(This is for all products, and you can eliminate any steps you don’t need).
- Prep the surface by chemically removing any existing finish and cleaning with mineral spirits. Allow to dry overnight or until completely dry. If you are painting your project, and the original finish is stable and wholly adhered to the substrate, consider not removing it. Prime it to ensure product compatibility. Always remove unstable existing finishes.
- Sand the wood, if necessary. Sand the wood surface with 150 -180 grit sandpaper. Remove sanding debris. Sanding will create a smooth surface. If painting, you may wish to scuff sand to create better adhesion.
- SANDING NOTES: Do not sand antique pieces unless absolutely necessary. Sanding damages the patina and can reduce the overall value. Additionally, some people will sand over 180 grit for contemporary furniture, which isn’t unnecessary and can inhibit stain absorption, especially on harder woods. Sanding finished furniture is rarely needed because it was already sanded at the factory, and sanding can remove too much wood, especially on veneered pieces. See my article on How to Strip Furniture.
- *If you are using water-based products on the project, consider raising the grain. Wipe with a damp rag and carefully knock back the raised grain with 180—or 220-grit sandpaper. Then, any water-based products will not raise the grain.
- *Stain now or after the grain filler (step 12). See step 11 if using a pre-stain conditioner. Check the manufacturer’s instructions regarding a seal coat over the grain filler or stain.
- Apply the grain filler to the wood surface using a plastic scraper or a putty knife. Use the tool to push the filler into the wood grain, working against the grain at an angle and working in the direction of the grain for the final pass.
- Remove excess filler with a clean scraper or putty knife to remove any excess filler from the wood surface. Scrape the tool across the wood at a slight angle, working with the grain.
- Allow the grain filler to dry completely according to the manufacturer’s instructions. Drying may take anywhere from a few hours to overnight.
- Once the grain filler is dry, scuff sand the wood surface with fine-grit (320 or so) sandpaper to smooth out any rough spots or bumps and improve the adhesion of subsequent filler layers. *Be careful not to sand through the seal coat into the stain.
- If necessary, apply another coat of grain filler, following the previous steps 5-8. Do this as many times as required to achieve a smooth surface.
- Apply a seal coat, if recommended by the manufacturer over the grain filler, if used.
- Apply a pre-stain conditioner if using. Wait the required amount of time before staining. *NOTE You won’t need a seal coat and a pre-stain conditioner. Either use a multi-purpose product or do a test board to see which product works best.
- Stain (or paint) the piece and allow the stain to dry per the manufacturer’s instructions.
- Apply two coats of sanding sealer following the manufacturer’s instructions for the dry time between coats.
- Sand the second coat once dry and remove all dust with a vacuum and damp rag. Allow to dry.
- Apply final finish coats. Apply your chosen finish to the wood surface using a brush, roller, or spray gun. Allow the finish to dry completely before applying additional coats. Apply at least two coats. You can wet sand the final finish coats to remove dust nibs and brush strokes. Sanding the final coat will affect the sheen.
Some additional tips for Using Grain Filler
- Choose a grain filler that is compatible with your chosen finish.
- Test the grain filler on a small, inconspicuous area of the wood to ensure that you are happy with the colour and consistency of the filler.
- Use a high-quality scraper or putty knife to apply and remove the filler for a smoother finish.
- When working with solvent-based grain fillers, work in a well-ventilated area and wear protective gear, including a mask and gloves.