Where we are a year later (more actually!)
As much as I want to keep followers of the Furniture Flipping 101 blog updated on our basement renovation progress, I am WAY behind. And as much as these changes are significant in our lives, I know they aren’t as critical to my followers. But I am here now to give you an update on our basement renovation: what we have done, where we are now, and the renovations yet to come. Read to the end to see the transformation from 1981 to 2024! 
Last Year's Basement renovation Work
The last I updated our basement renovation, we had built one of the bedroom closets and needed to finish framing the hall wall and add a second closet. We completed the framing, installed the drywall, taped, mudded, primed, and painted the closet doors: two 36” standard doors, a sliding mirror door, and the bedroom door. Rather than have bifold or sliding doors on the pantry, we opted for two regularly opening doors with a pressure catch at the top to keep them closed and remove the need for a centre pillar. This design allowed us to access the pantry fully.
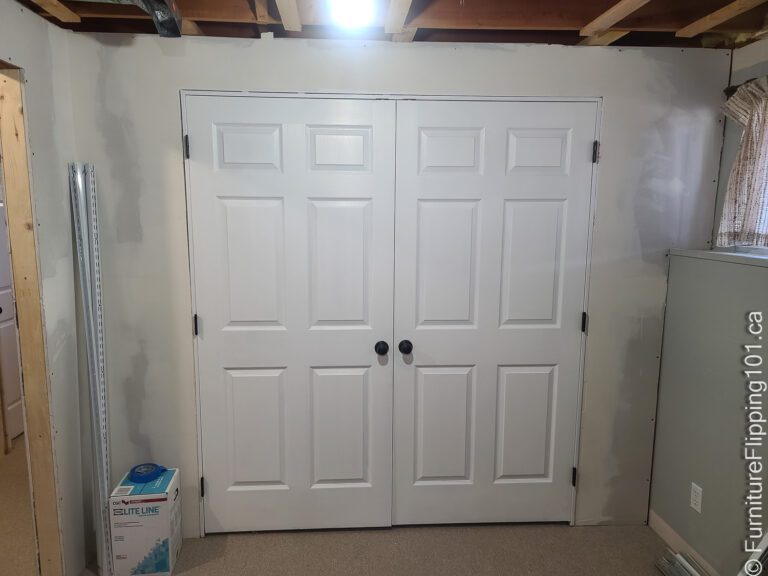
Overall, I am delighted with the results. The only change I would make is adding a light to the pantry. We assumed the ceiling light in front of the doors would be enough, but this deep closet needs more light. I would add a pressure switch to the doors to turn on and off automatically, but that would require another wire. We may add it – the closet under the front stairs has power to a light, and it is likely not that difficult to incorporate. I’ll add it to the never-ending list… haha!
We also reinstalled the drop ceiling in the bedroom, but this time, my husband ensured it was neat and tidy, with the borders as close to symmetrical as possible. The overall look is quite pleasing and makes a great spare bedroom. We completed the spare bedroom last spring and took the summer off from renovations, focusing on camping, gardening, and yard work.
I went through my photos and couldn’t find a picture of the finished results. Once we get the bedroom cleaned out from this renovation’s storage, I will have to update this post.
Getting Started on the Basement RenovationThis Year
We didn’t start the basement renovations until after Christmas as things kept coming up. And then, in the middle of our fresh start, we vacationed in Hawaii for my birthday. It was a great trip, and we met Australian friends we have only seen every five years or so. However, it did delay the renos.

If you are renovating your home, I am sure you can understand how frustrating it is for things to take so long to complete. My husband works full-time, plus overtime, and seems to be the go-to guy for vehicle repairs and other projects the kids and family members need. But here we are.

In the above image you can see the wall we will remove in green. The top section of the room will be a TV/lounge area and the bottom section will be the pub.
Out With The Old: Removing the Basement Bedroom
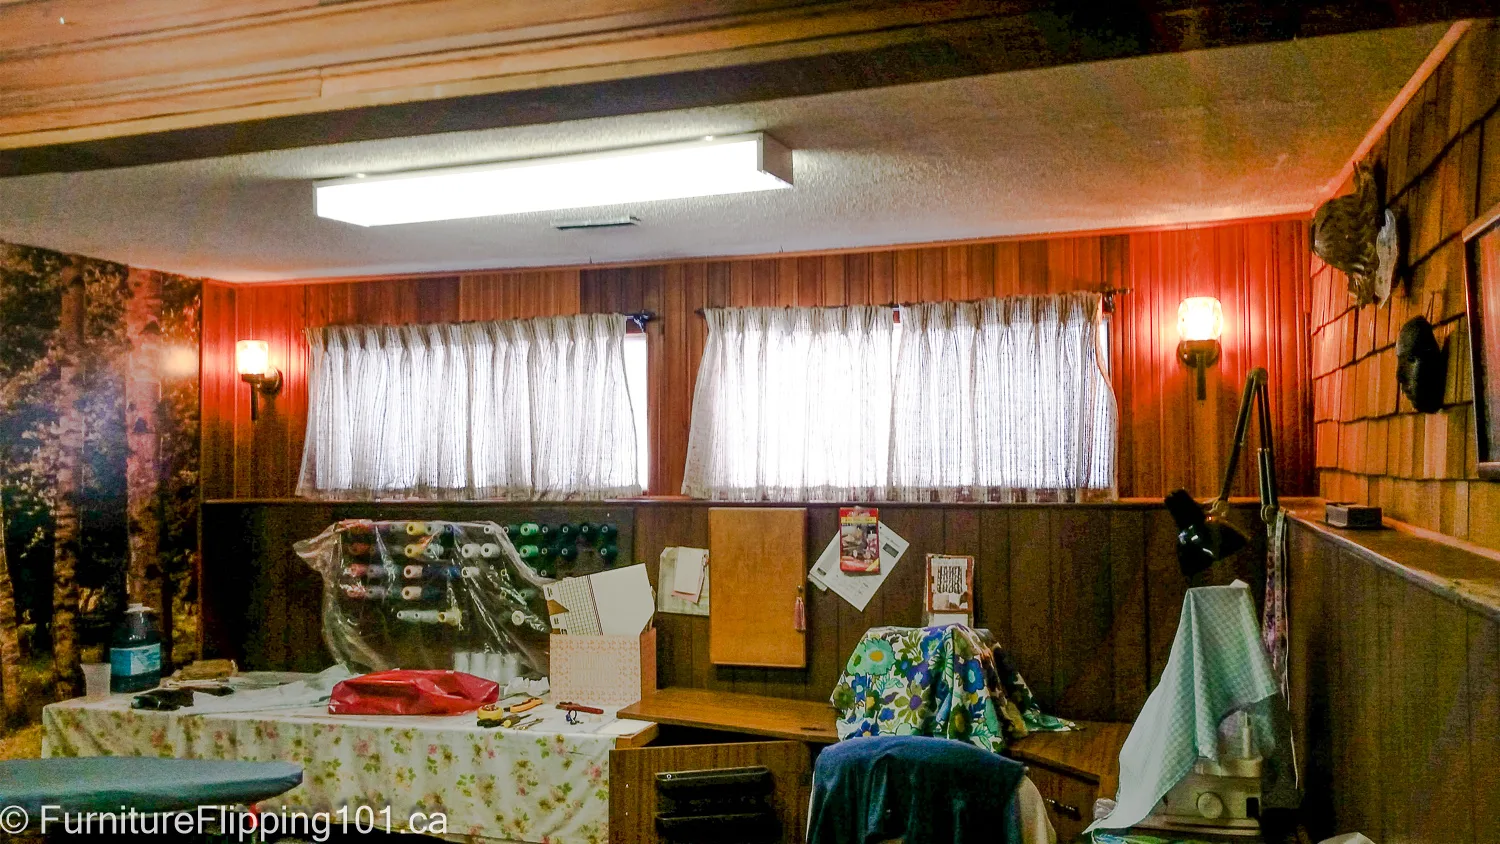
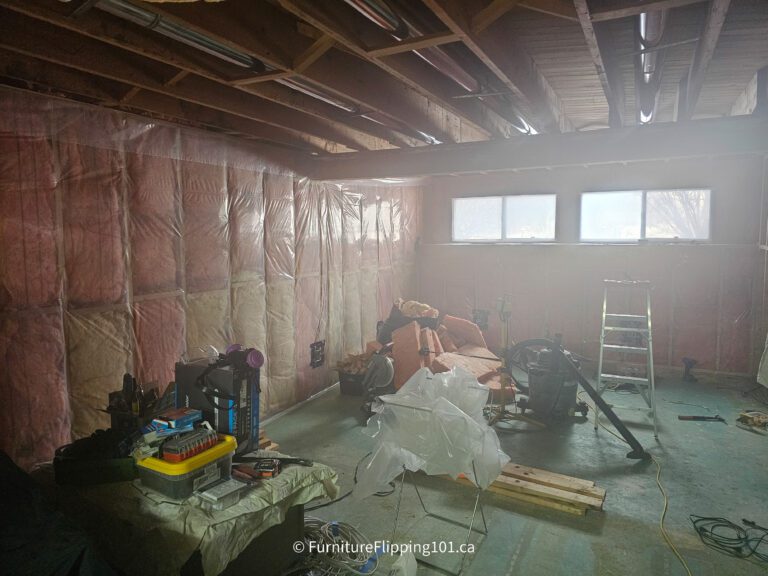
According to writing on the closet framing, the previous owners did their own basement renovation by adding the bedroom in 1981. And, well, it is past due time to say goodbye to the outdated style. We have removed the bedroom wall, carpet, and old drywalled ceiling with an inch-thick layer of stipple (or so it seemed), took out all of the old, rather sketchy lighting – the fixtures always seemed on the verge of bursting into flame or shorting out. The light in the weird room, as I referred to it, was melted some.
We tore down the dark panelling and cedar shake (you know, the stuff you use outside on the side of your house?) and some lovely cedar panelling. I salvaged the cedar panelling for a possible future project, and the cedar shake will go on the outside garden shed. Previously, we removed some shakes from the workshop area and covered three sides, and now we will finish the back of the shed. I love being able to salvage materials.
Basement Renovation 101: Fixing The Old Problems
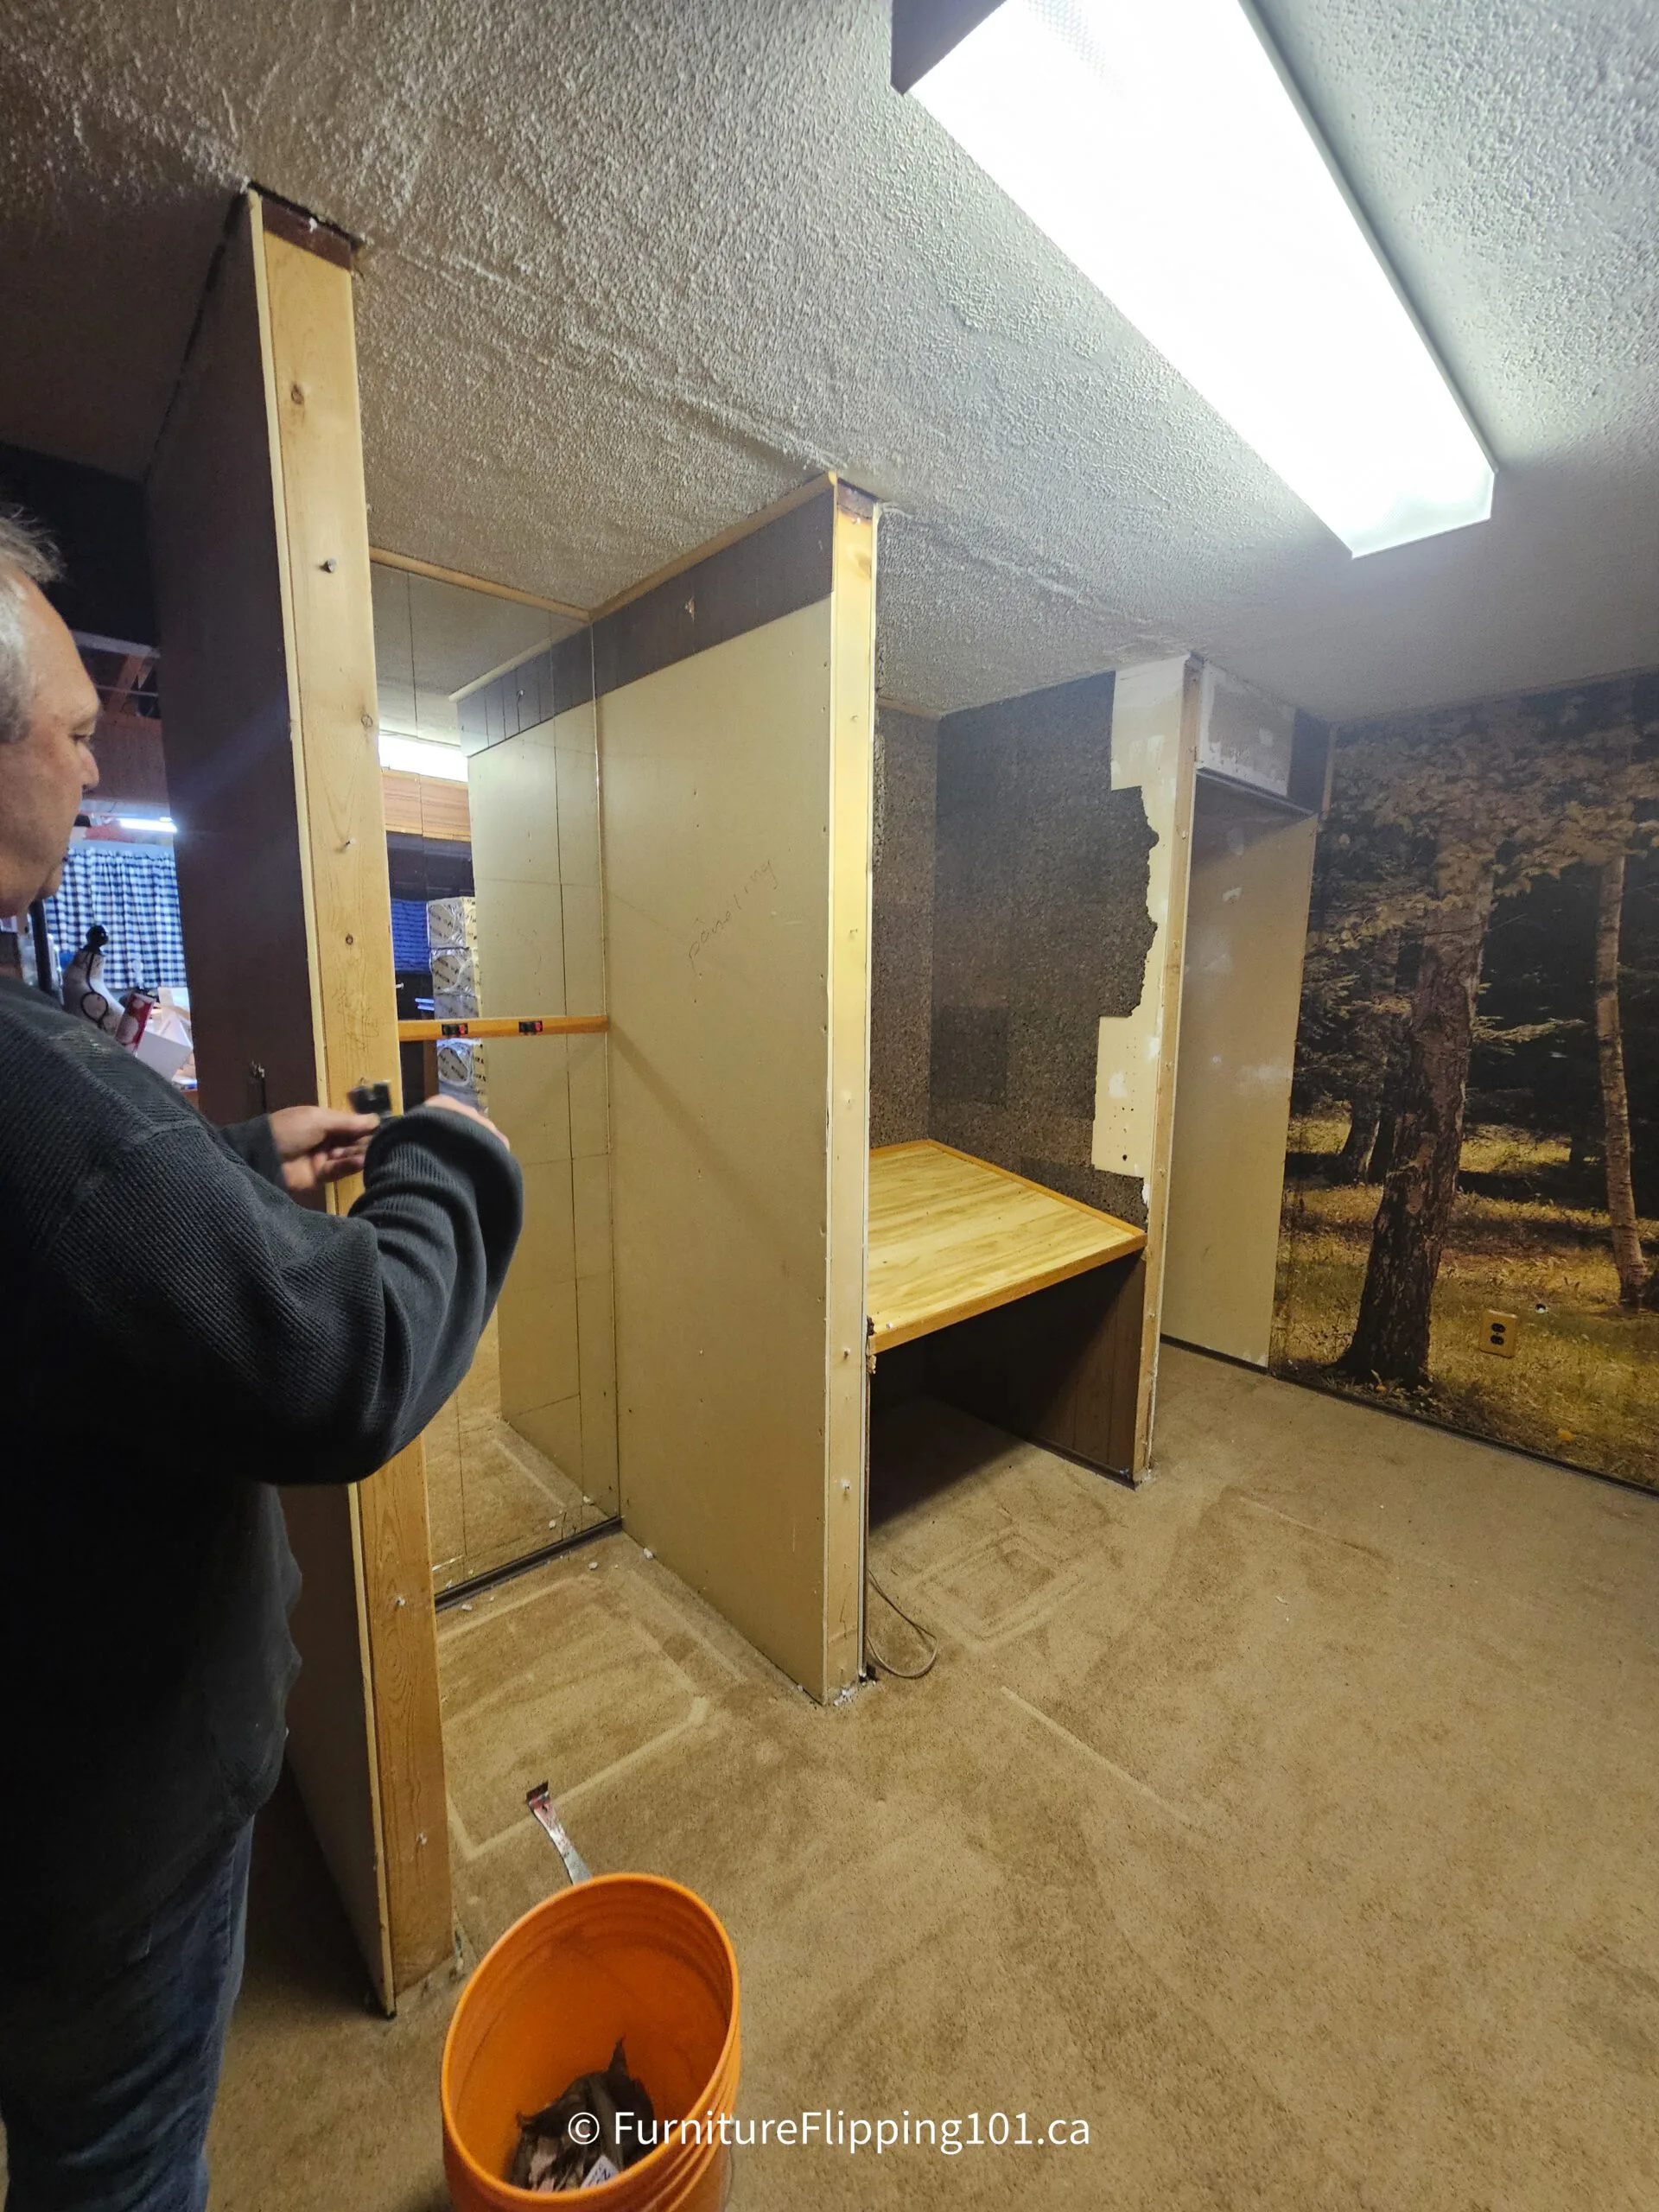
When renovating you are bound to run into problems. Unfortunately, the previous basement renovation ‘experts’ didn’t know what they were doing and framed the bedroom with a 16” spacing between studs instead of 16” o.c. (on centre). This spacing meant the drywall boards would not line up (48/4=16). They also neglected to frame in a top plate for the drywall.
Additionally, the weird room existed before the bedroom, and it was framed with rough-cut 2x4s, so the wall would not line up correctly once we removed the dividing wall. The only way to solve these problems was to remove the drywall (and ‘wonderful’ wall mural) and reframe. The old poly wasn’t in good shape, so the work was needed to bring everything up to today’s standards. We did manage to salvage a few sheets of drywall to use, but for the most part, everything needed to be scrapped and bought new. While it can be frustrating, take longer and cost more money, it is always important to fix the old problems when you are doing a basement renovation, or any renovation for that matter.
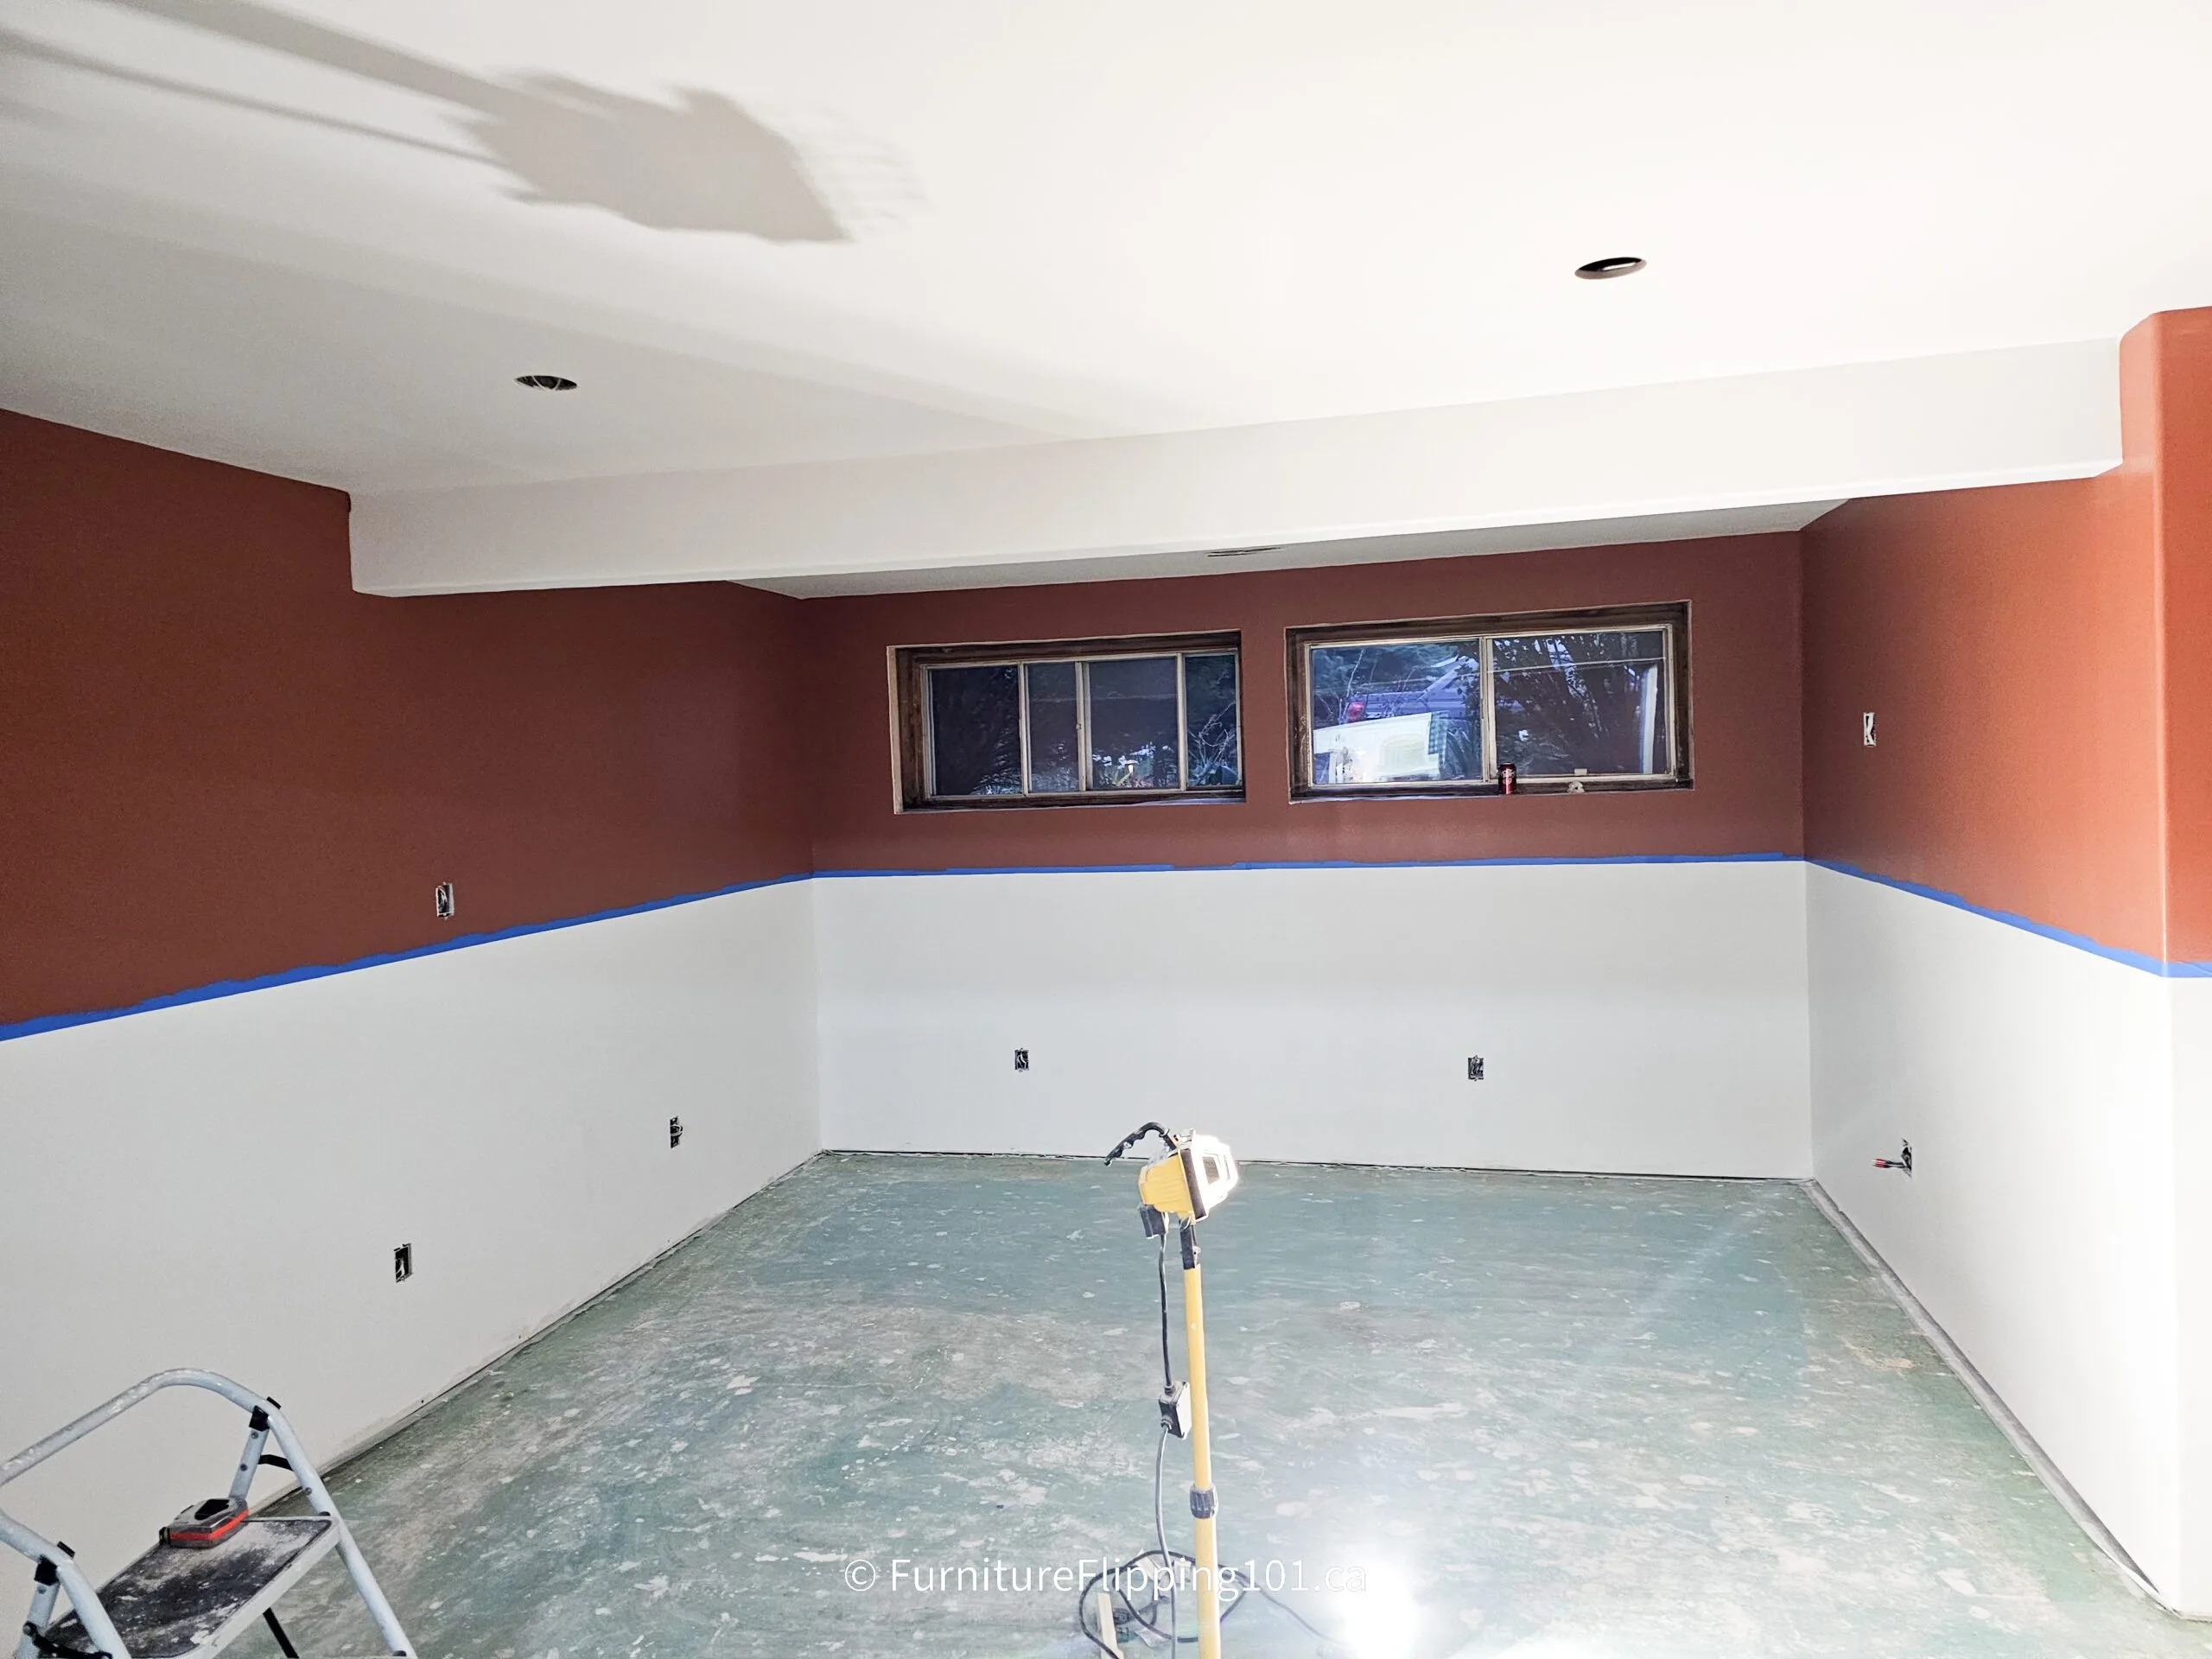
A seven-inch ledge is part of the house’s foundation along one wall and partially along another. We kept the ledge in the bedroom reno, but I didn’t want to keep it in the living room area. I think it would be a dust magnet and has no design purpose. My husband framed the walls flush to the ceiling to eliminate the inconvenient ledge. This design means we will have a deep window well. I am okay with this ‘feature’ since the curtains can now hang to the floor instead of the short ones they had. Framing the wall flush also helped create a smooth wall where the TV would hang instead of trying to work around the ledge.
We still have to buy windows to replace the old aluminum ones, which is a bit backwards. Ideally, we would have replaced the windows before framing the room. But it was winter when we were framing and drywalling, and we didn’t want to change them in those temperatures. Plus, we are already stretching our budget for everything else we are doing. Several windows need replacing, so we may need to consider financing those. They can wait until summer, fall, or maybe next year.
Basement Living Room Renovation Progress
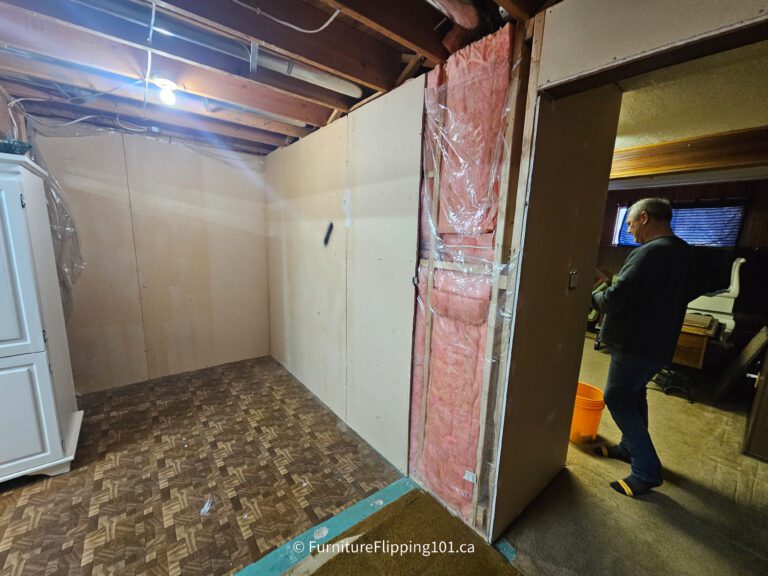
In the newly created hallway connecting the living room to the new spare room, the front stairs had a doorway with a door jamb and casing. We decided this made it look dated and updated it to include round corners. This step also made the doorway wider and flush with the stairwell. A closet under the front stairs had a set-back accordion door. We removed this, and my husband framed the door flush to the hallway, increasing its opening size and the amount of storage space (it hasn’t been removed yet in the photo below). This closet will have a regular door that opens into the hallway. The doorway into the pub area was also removed and framed flush with the hallway and has round drywall corners now.
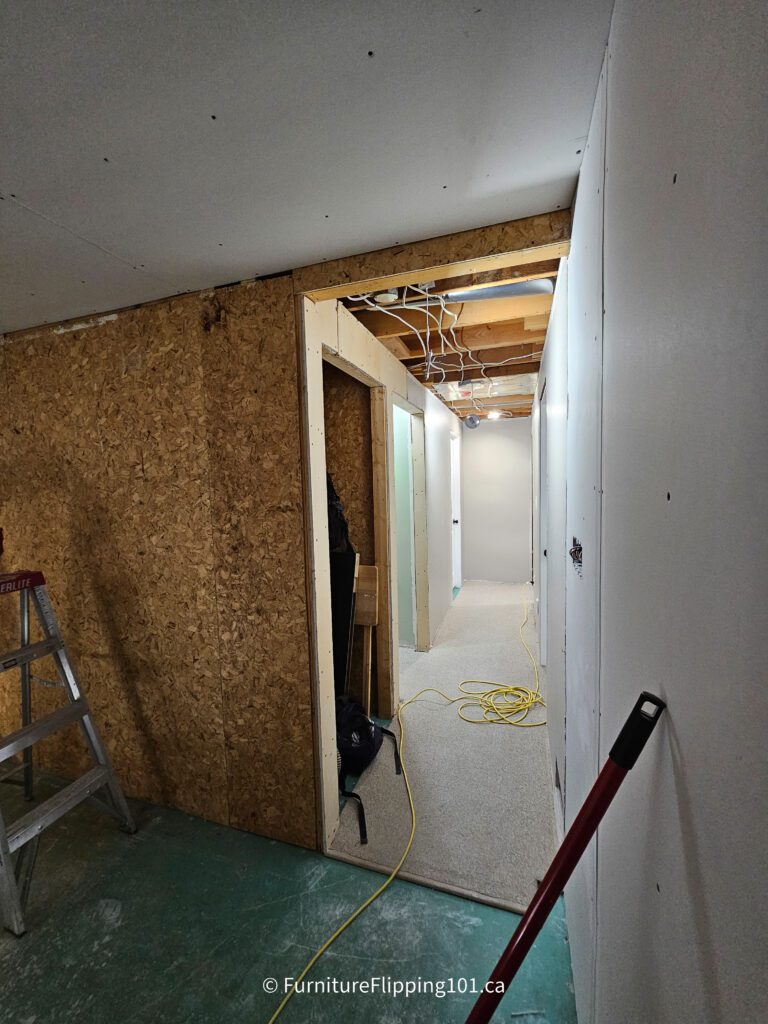
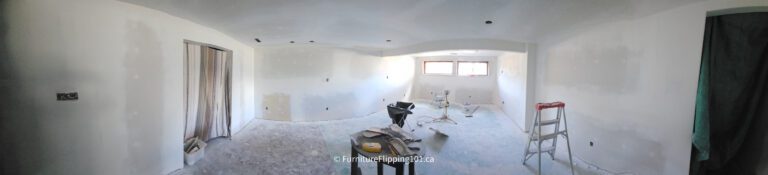
While reframing the walls, we built a new wall enclosing my workshop. This wall has a four-foot opening that will allow me to move more oversized furniture items in and out without trouble, keeping in mind the furniture must be small enough to fit through the front stairwell and around the corner. You can see the opening in the panoramic photo below.
Drywalling and Painting
Originally we planned to use ceiling tiles in the living room, but because the rooms above the new room do not have any plumbing that might lead to leaks, we decided to drywall the ceiling. We bought ceiling tiles from the Marketplace, and by using drywall in this area, we have enough to finish the laundry room, workshop, future bathroom, and hallways. A drywalled ceiling looks more modern and feels less like a basement.
The boarding, taping, and mudding were big jobs – ensure you are up for the task if you take these on. We borrowed a drywall lift for the ceiling, which is a must. Rent or buy one secondhand (you can always sell it again). My youngest son, Alex, helped with the boarding. He has experience with this and was a great help. I ran out of steam faster than he did and had nowhere close to the same strength.
Next came the priming and painting. I still have a stitch under my shoulder from painting the ceiling! I much prefer painting furniture! Alex also helped with the priming and painting, for which I was very thankful. It helps to have 6’2” people around. My husband was busy working nights for a shutdown, and I wanted to finish the room before summer hit. Helping me with the priming and painting was my Mother’s Day gift.
Prepping the Floor
Next to come is the flooring. We chose lay-flat flooring, which is about as easy to lay as flooring available. It doesn’t lock together, it just lays flat, and the edges butt up against one another. However, this means it would be susceptible to gaping if the floor was too uneven. Because the concrete floor wasn’t too level -there were highs and lows, we poured self-levelling concrete to help mitigate this issue.
To prep the room for levelling, the floor must be very clean, which means removing any drywall mud residue and loose materials. The old carpet left a lot of glue residue. There were also holes where nails attached the walls to the concrete floor. We used a patching compound to fill those. Once the floor was clean, my husband rolled on the primer. The primer is very stinky, and we had to open the doors and windows to air out the house. (I am pretty sensitive to chemical smells, which is ironic given my career and all the chemicals I use.) After applying, you must apply the leveller within 24 hours or reprime.
Self-levelling might sound like it will level itself but it requires the correct ratio of product to water. We mixed 5 litres of water into the 50-pound bag for the first pail. Five litres of water was the higher amount on the instructions. But that didn’t go well; my husband struggled to smooth it out. In the next batch, we added 1.5 cups of water and decided two extra cups were better; another half a cup might have been better. However, be careful not to thin it too much, or it will weaken the final product. We used six 50-pound bags in the large room and down the hallway.
The internet recommends using a spiked roller to ensure the product levels out correctly. We also used a squeegee my husband had for the garage floor. The squeegee worked well. If you have concrete tools, you will likely have even better aluminum placers. Because the product is relatively forgiving and levels itself when mixed at the proper water-to-powder ratio, you won’t need too many more tools. Due to the spiked roller, the walls had some spatter on them. You can’t walk on the poured floor for 24 hours, but the spatter did wash off okay. The primer did not, however, and I haven’t tried painting over it yet…
As a caution, we did not remove the peel and stick tiles on the floor, believing them to be well adhered. However, the floor leveller has formed some cracks along the tile lines, so, in hindsight, we should have removed them. But we will put the floor down and see how it goes. If absolutely necessary, the floor will be lifted and fixed.
Our Vision for our Basement Living Room Renovation
The larger part of the room will be a basement pub with a bar, hightop, and dartboard. The smaller area of the room will have a television and sectional couch. We found brick-look peel-and-stick wallpaper for the main wall behind the bar and couch. The top half of the room is a brownish red and coordinates with the wallpaper, and the bottom is antique white from Home Depot and will be false wainscotting. The wainscotting boards will be Luan plywood (we hope this will work out okay and they won’t be too weak). The light over the table is one my husband’s mom made for him in stained glass. The two pendant light globes were ones I found at a Restore and loved, even though I had no place for them then.
For the bar, we found a cabinet on Marketplace. The man we bought it from had made it with his dad several years ago from oak plywood. I removed the dark-brown stain and restained it using Candlelight from General Finishes in a penetrating oil-based stain. We bought black hardware to complement the black pipe shelving we plan to create to hang in front of the mirror over the bar. The shelves will hold liquor bottles and have recessed LED lighting strips.
Up Next on our Basement Living Room Renovation
Next, we will lay the flooring and install the baseboard (which I still have to paint). Then, the wainscotting will go on. We found curtains we like that will make the room cozier. I still have to shop for pub items to hang on the walls. That is the fun part, and hopefully, it will tie the room together without making it too kitschy.
My basement workshop is at the end of the big room. We will cover its four-foot doorway with two barn doors (six-panel doors that match the rest of the house). I would love to move on to renovating the workshop next and finally get a good ceiling in there along with some better-organized shelving, but after this room, I believe we will work on the laundry room and bathroom. That likely won’t happen until fall, as summer is fast approaching. I hope to have an update sooner than later for everyone! Until then, have a great summer!