fbpx
Furniture Flipping 101
Learn to Earn

Article Category: Home Reno

*As an Amazon Associate, I earn a small amount from qualifying Amazon purchases at no additional cost to you.

Affiliate links are provided throughout the website and provide me a small measure of income when you make a purchase using those links.

*As an Amazon Associate, I earn a small amount from qualifying Amazon purchases at no additional cost to you.

Affiliate links are provided throughout the website and provide me a small measure of income when you make a purchase using those links.

As part of our basement renovation, we are closing in the furnace or utility room. There is an existing doorway that gives access to that room. Since that door was the only access between the front and back of the house, we needed to cut a doorway into a load-bearing basement wall to create a new access. See the blue rectangle in the floorplan image below. 

Previously, we removed the old pantry that was in the way.

First, before opening the wall, we had to redirect the plug wire over the planned opening to keep power to the bedroom outlets. Once the wire was out of the way, we could cut through drywall and chipboard to cut the doorway. We aren’t sure why the builder used chipboard, but it is a supporting wall, and the chipboard might be structural or a firewall.

How to cut a doorway into a load-bearing basement wall Table of Contents

How to Cut a Doorway Into a Load-Bearing Basement Wall

If you want to create a more open floor plan in your basement or need a new access point to another room, you may need to cut a doorway into a load-bearing basement wall. This process may seem daunting. However, with proper planning, tools, and technique, you can safely and effectively cut a doorway into a load-bearing wall without compromising your home’s structural integrity.

7 Steps to cut a doorway into a load-bearing basement wall

1. Consult with a structural engineer

Before you begin to cut a doorway into a load-bearing basement wall, you should consult with a structural engineer or a licensed contractor. A load-bearing wall supports the structure’s weight above it, and any modifications must be done carefully and with professional guidance.

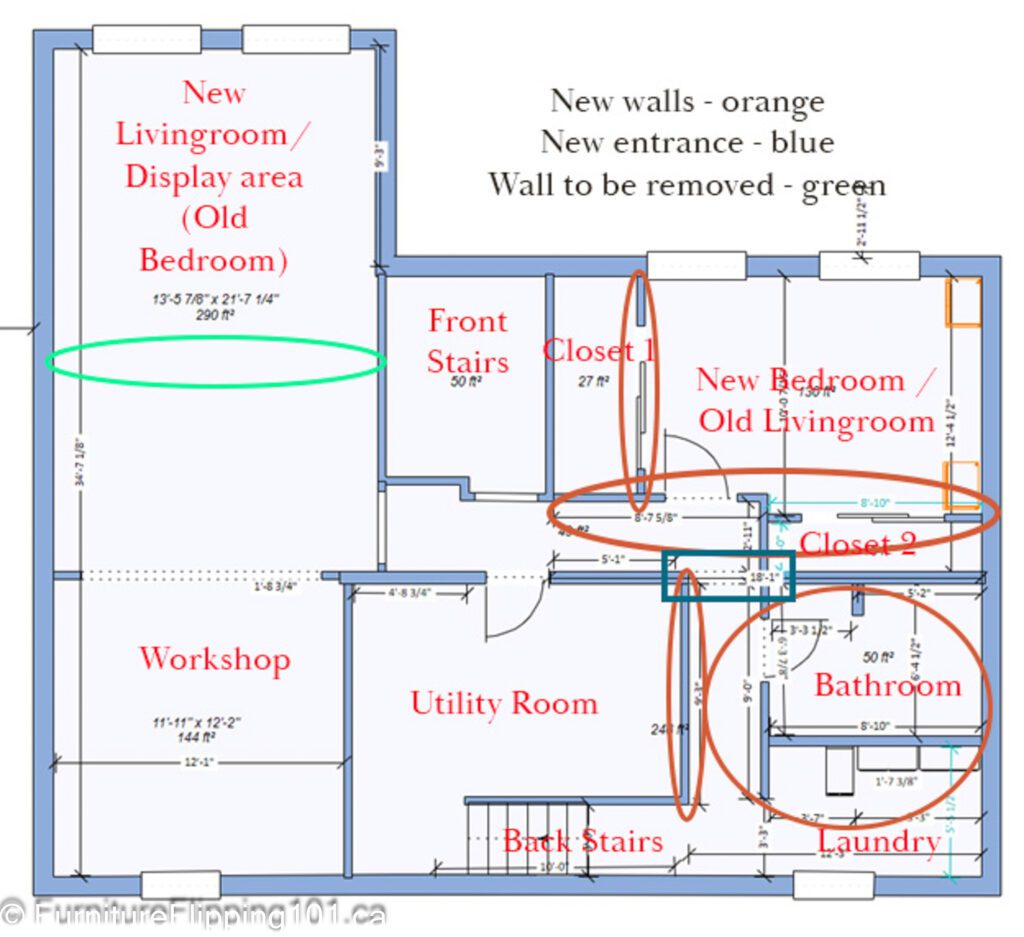
We used the existing doorway in the load-bearing wall as a guideline – replicating the header size and door opening. There isn’t a beam in this supporting wall – the wall is 2x6s and has a standard top plate. The existing door in the furnace room has a double thickness 2×10 header and is the same size as the opening we are adding, so we will copy that design to make this doorway.

*When we removed walls upstairs, we had an engineer sign off on the changes before proceeding.

2. Determine the location and size of the doorway

Once you’ve consulted with a professional, decide on the location and size of the doorway. Keep in mind that a load-bearing wall supports the weight of the structure above it, so carefully plan the size and location of the doorway to avoid compromising the wall’s strength.

3. Gather the necessary tools and materials

You’ll need a few tools and materials to cut a doorway into a load-bearing basement wall. These include a oscillating multi-use saw, reciprocating saw or circular saw, a hammer drill (if adding concrete anchors or removing concrete wall) a four-foot-level, a tape measure, safety glasses, possibly a dust mask, and hearing protection.

Check out the full list of tools and accessories at the end of the article. 

4. Mark out the rough opening size

Find the rough-opening size on the door packaging for pre-hung doors.

Using a level and tape measure, mark the outline of the doorway on the wall. Ensure the outline is square and level, as any unevenness could affect the wall’s structural integrity and the door’s functioning.

5. Cut the doorway opening

Using one of the saws, carefully cut along the marked outline of the doorway. Using a saw with a blade designed for cutting the type of wall material.

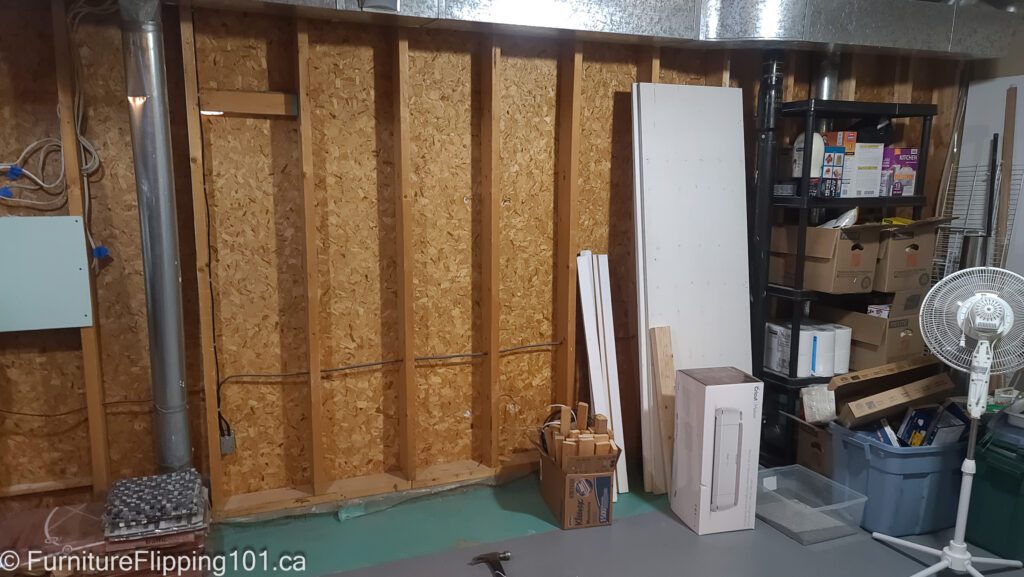
We used a multi-tool with a wood saw blade to cut through the two layers. For some reason, I forgot to video that part. The tool is straightforward to use; you just run the blade down the line and work your way through the materials.

6. Create the header

Once we removed the drywall and chipboard, we needed to remove the wall studs and frame the doorway.

To cut a doorway into a load-bearing basement wall, you need to maintain the wall’s strength. You’ll need to create a header above the doorway to do this. Ensure you follow standard construction practices – use jack studs to hold up the doorway or follow the engineer’s instructions. The door header carries the weight of the floor joists over to the jack studs. Cripple studs fill in the gap at the top if needed.

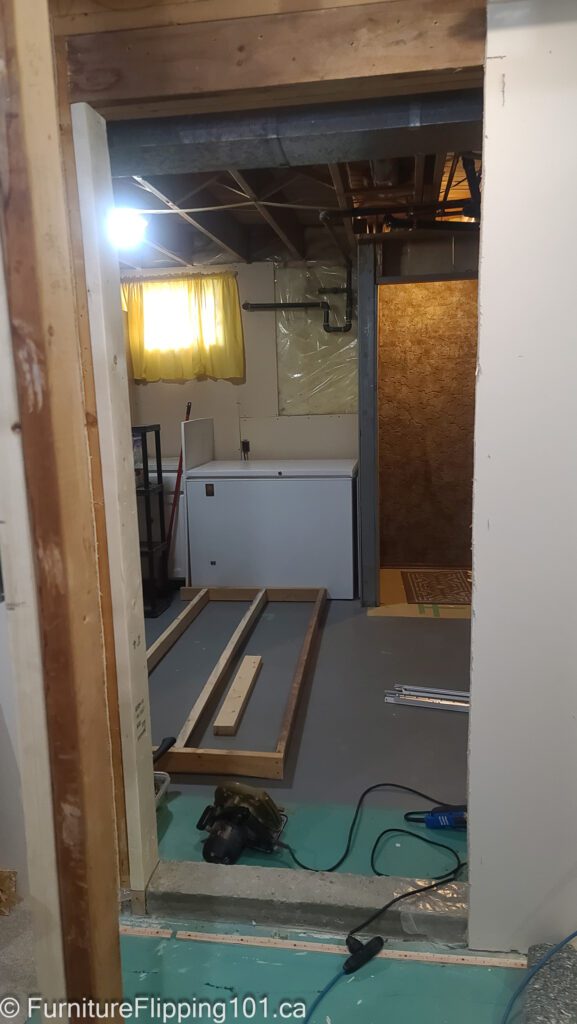
Because the wall is a supporting wall holding up the floor joists, the joists would need support while removing the existing studs and installing the new ones. Giraud framed a simple wall to brace the joists while he added the doorway. Once Giraud replaced the studs and added a header, he removed the supporting brace and dismantled it to use the wood in the walls we were adding.

7. Finish the doorway

Once the header is in place, you can finish the doorway by installing a door jamb, door frame, and door or, as we are doing, drywalling the opening.

Adapting Our Plans

After we cut the doorway, we noticed the existing footing had a doorway allowance framed with 2×6 blocks for nailing the jack studs. The pantry hid the blocks when we were planning the basement layout. Coincidentally, we happened to have planned our doorway within an inch or so of where the blocks were, so when we discovered them, we decided to adapt our plans.

In the end, it didn’t save us a lot of trouble by moving the doorway. We had to adapt the end wall where closet number two and the hallway intersected by using 2x6s with some drywall blocking so the wall would line up with the doorway and future south hallway/bathroom wall. The utility room lost an inch or so, and the bathroom/laundry room gained it.

We did run into an issue with the opening being slightly too small. It was 36,” but adding drywall made the doorway less than the planned 36″. We have enough room to remove the washing machine or dryer if necessary, so we aren’t too worried about the slight difference. It can be challenging to think through every change and its effect on other aspects of the construction. 

You can see one of the wood blocks in the photo below. 

cutting a doorway into a load-bearing basement wall studs removed
Studs removed, jack studs added, header installed. Temporary support wall to hold up joists on floor in other room.

Cutting out the Concrete Footing

Before we could finish the opening, we had to remove a concrete footing in the threshold. We removed it by cutting it out and grinding it flush. Check out the video to see the process. 

Removing the concrete was a messy job. We tried to mitigate the mess by controlling the dust using a shop vac and spray bottle (I would recommend a squirt bottle instead – less hand fatigue and you can add and direct the water) . If you are cutting outside, you can use a hose to cool the blade and control dust, but since we didn’t want to create a flooded area, we used the bottle.

By cutting perpendicularly across the concrete in the threshold, we created small slabs which are easier to remove than smashing out the concrete. The first cuts didn’t make small enough pieces, so we made another pass, cutting those slabs in half. We should have had a bigger saw and blade since the saw’s depth wasn’t deep enough to remove the thickness of the slab on the first pass. But we used the tools we had on hand.

We still need to grind out the threshold to smooth the concrete. Our blade wasn’t great, so we ordered one from Amazon and will finish it once it arrives.

Tools and Supplies Needed

Up next – framing the north hallway and second basement closet. 

share this article:

Facebook
X
Pinterest

Leave a Reply

Looking for more? Check out these articles.

Thank you! Your responses have been received.